This is an old revision of the document!
Main Menu
The Main Menu is designed to facilitate starting and loading save games and to make settings changes. But there are a few other minor features implemented here as well.
Main Tutorial Popup
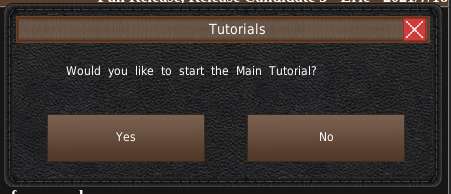
If you have tutorials enabled, the first thing you might notice at the center of the screen is the Main Tutorial popup. If you wish to start the main tutorial, click “Yes.” If you want to prevent this popup, you'll have to disable the tutorial system. The popup will not go away even after you do the main tutorial. But you can either ignore it, hit the escape key, or click the close button. For more information on tutorial popups and the help system in general, visit the Help Systems page.
News Page
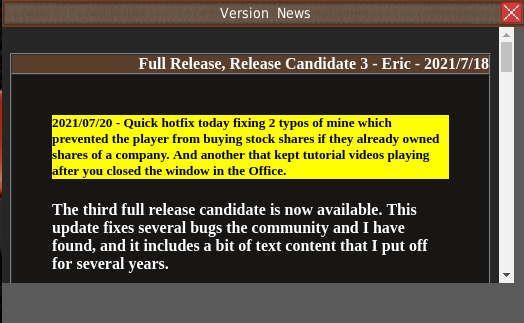
The News window also displays in the middle of the screen under the Main Tutorial popup. This window shows the latest GearCity news and might occasionally contain information about our future games. So check the date on the page now and then.
There is no way to disable the News window.
Top Bar
At the top of the screen is the version number and the Help Menu. Check out the Top Bar and the Help Menu pages for more information.
Menu
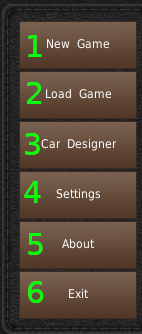
Along the bottom right of the screen, you'll find the menu. You'll need to use this Menu to do something other than looking at the game logo.
- The about button opens up the credits.
- The Exit button exits the game. Duh!
New Game

If you want to start a new game, you'll need to open the new game window by clicking the New Game button from the menu.
The new game window will appear.
- When you start a game, you'll need to enter a save name. Technically, the game will create the initial database and reports folders using this name, thus why we have to have a save name at the start.
- This section of the New Game window contains the starting year slider. Adjust this slider to select which year you want to start the game. If established AI is enabled, the game will simulate companies from 1900 until the selected year. Please note, if you change the map in section #7, the year slider will reset. Maps can have specific starting and ending years which causes the game to reset the year slider values.
- Use these radio buttons to select the difficulty level of the game. Each selection sets predefined options values. We cover the differences between difficulty levels in the Individual New Game Settings page.
- This area gives a brief description of the options you choose in the upper part of this window (#1-3). The feature is mainly a holdover from our alpha releases.
- Click the continue button after you have set a save name (#1), selected a map (#7), and set your starting year (#2), difficulty setting (#3), and options (#7). This button will take you to the HQ selection room.
- These four buttons are advanced game settings. They change the panel below. The default panel is the Map panel. We will cover that on this page. We cover Options 1, Options 2, Skills/Image, and difficulty settings in-depth on the Individual New Game Settings page.
- Map
- Map Details
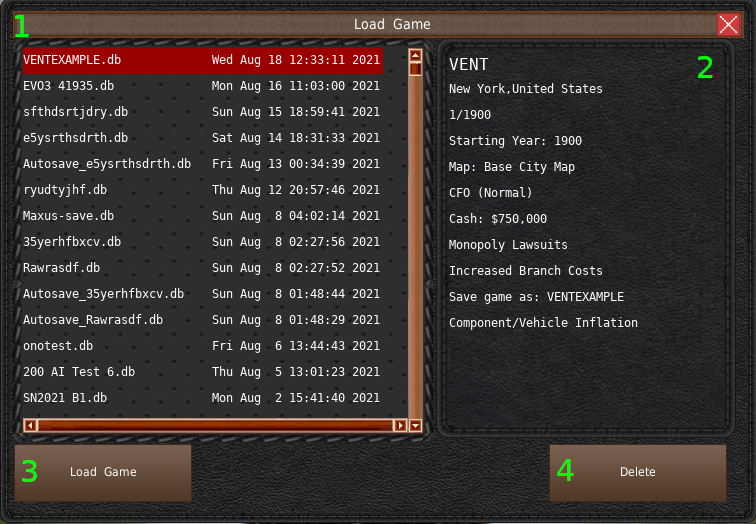
Load Game