
Table of Contents
Quick Tutorial
The Quick Tutorial is a verbatim copy of the Main in-game tutorial. We recommend you do the in-game tutorial when possible. However, this chapter is a good reference point if you want to review some concepts.
You can find the full video tutorial on the video tutorial page or on youtube. While in-game, please use the in-game video tutorials page.
Part 1: Main Menu
You can find this part of the video tutorial on the video tutorial page. While in-game, please use the in-game video tutorials page.
1. Welcome to GearCity.
GearCity's primary goal is fun. We attempt this by simulating historical and economic situations in the automobile industry. This is not your ordinary tycoon game. It is an economic business simulator.
We strive to make the game as easy to play without compromising game mechanics. As such, the game has not been dumbed down like some tycoon games and has a higher than average learning curve. It may take you several hours to learn all the concepts in this game, but if you follow the main tutorial, you will understand the core fundamentals of the game in less than an hour.
To continue the tutorial, click the “Continue” button. If you wish to disable the tutorials, please click the Green Glowing “Help” button in the upper right-hand corner of the screen.
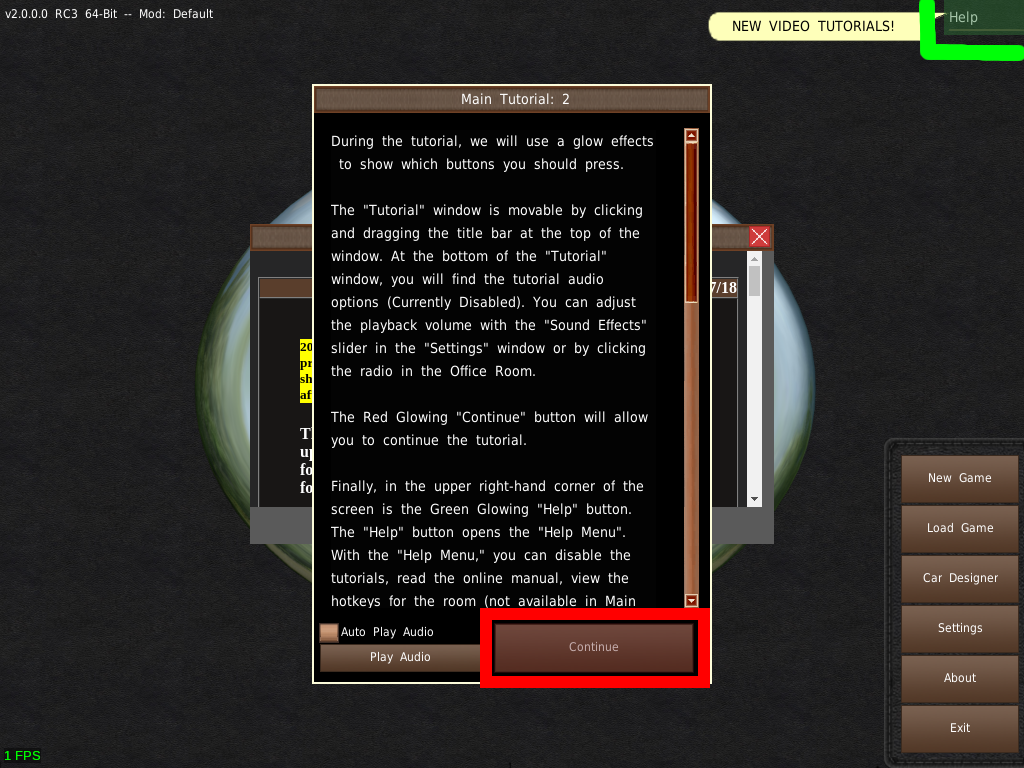
2. During the tutorial, we will use a glow effects to show which buttons you should press.
The “Tutorial” window is movable by clicking and dragging the title bar at the top of the window. At the bottom of the “Tutorial” window, you will find the tutorial audio options (Currently Disabled). You can adjust the playback volume with the “Sound Effects” slider in the “Settings” window or by clicking the radio in the Office Room.
The Red Glowing “Continue” button will allow you to continue the tutorial.
Finally, in the upper right-hand corner of the screen is the Green Glowing “Help” button. The “Help” button opens the “Help Menu”. With the “Help Menu,” you can disable the tutorials, read the online manual, view the hotkeys for the room (not available in Main Menu and New Game Screens), and open the Chatroom. You can access this menu in every part of the game.
Go ahead and click the Red Glowing “Continue” button and explore the Main Menu.
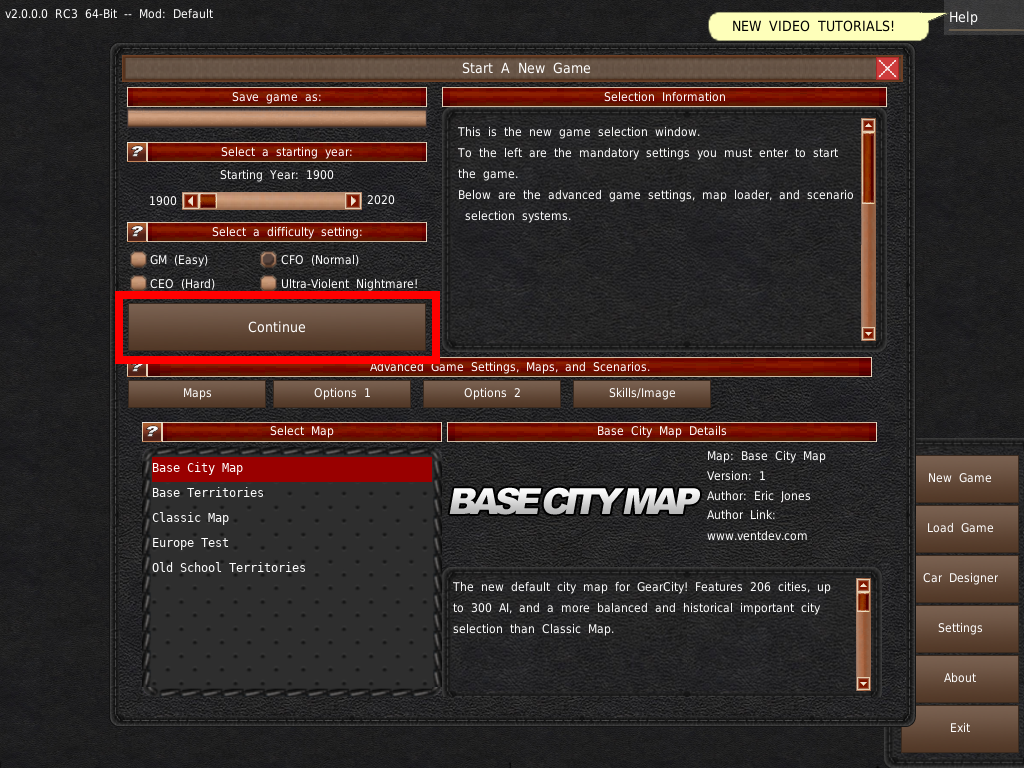
3. Below this window is the “Start A New Game” window. Here you set the save file name, the basic starting settings, and which map you wish to play on. The window also contains the advanced starting options under the “Option” and “Skills” buttons.
We recommend for first-time players to select later game years between 1950 to 1980 and Easy difficulty.
When you have finished setting up your game, click the Red Glowing “Continue” button in the “Start A New Game” window.
Part 2: HQ Selection
You can find this video tutorial on the video tutorial page. While in-game, please use the in-game video tutorials page.
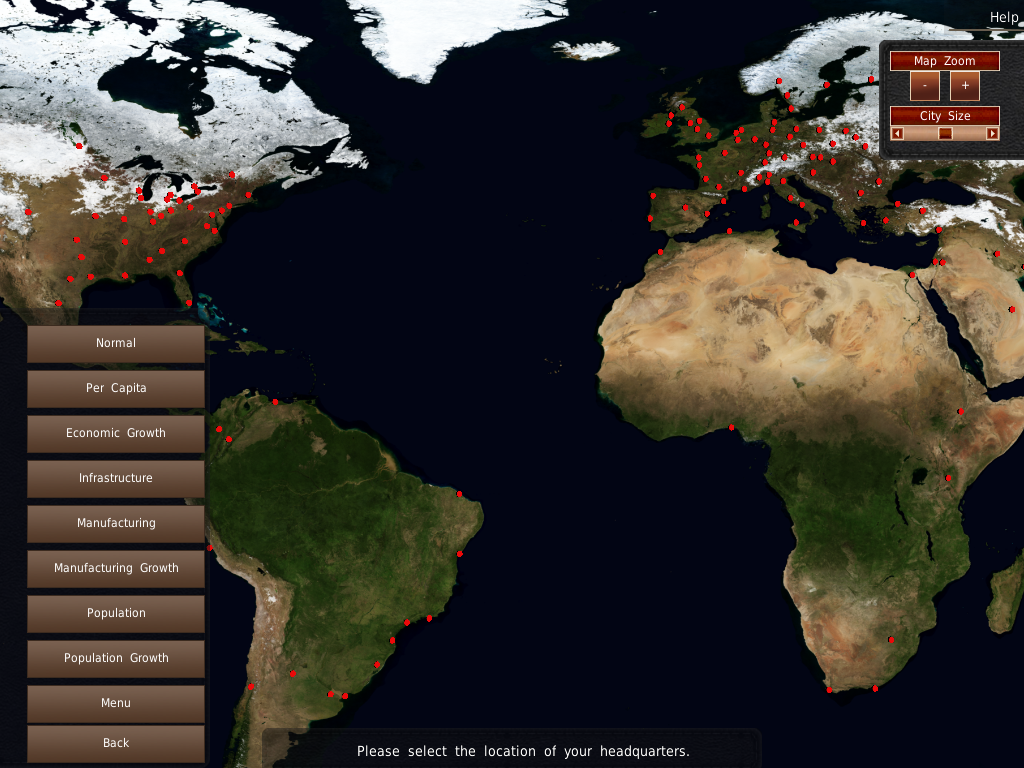
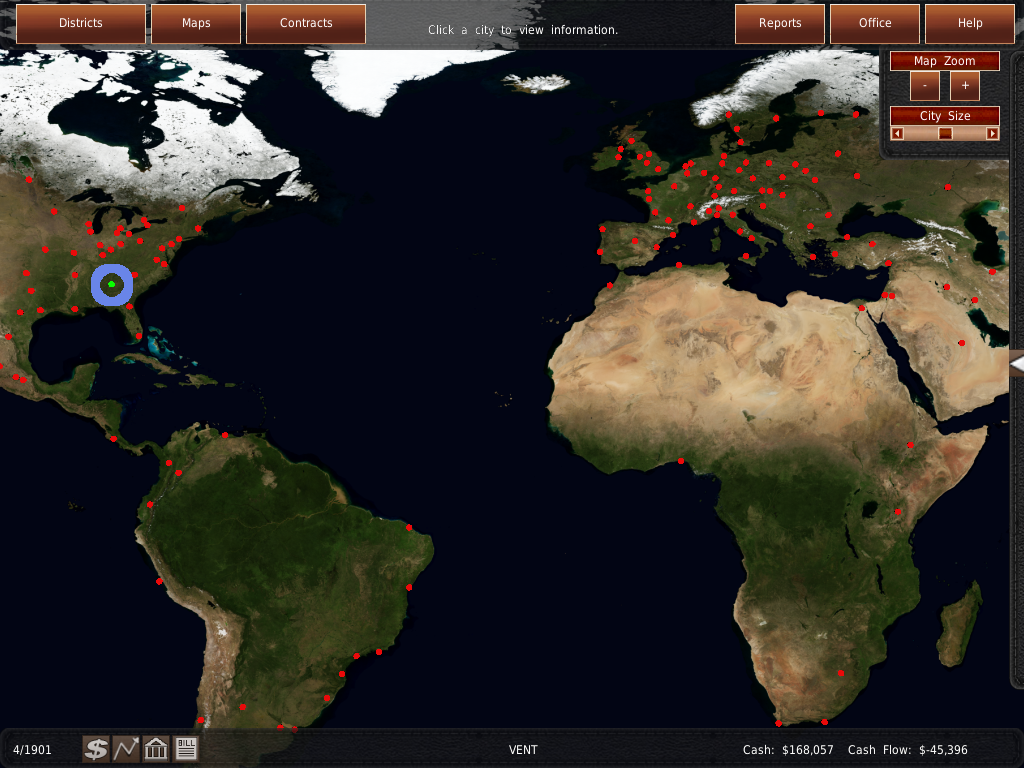
4. Welcome to the “New Game World Map.”
Here you need to select the headquarters of your company. Depending on your game settings, you will receive a starting factory and branch at this location. Your selection also affects military contracts available during a war and the tax rate you pay.
Based on which map you chose, there will be either dots or territories of land on the map below. If it is a city-based map, clicking on the dots will bring up the information for that city. And if it is a territory-based map, clicking the landmass will bring up the information for that territory.
Please click “Continue,” then select a location on the map.
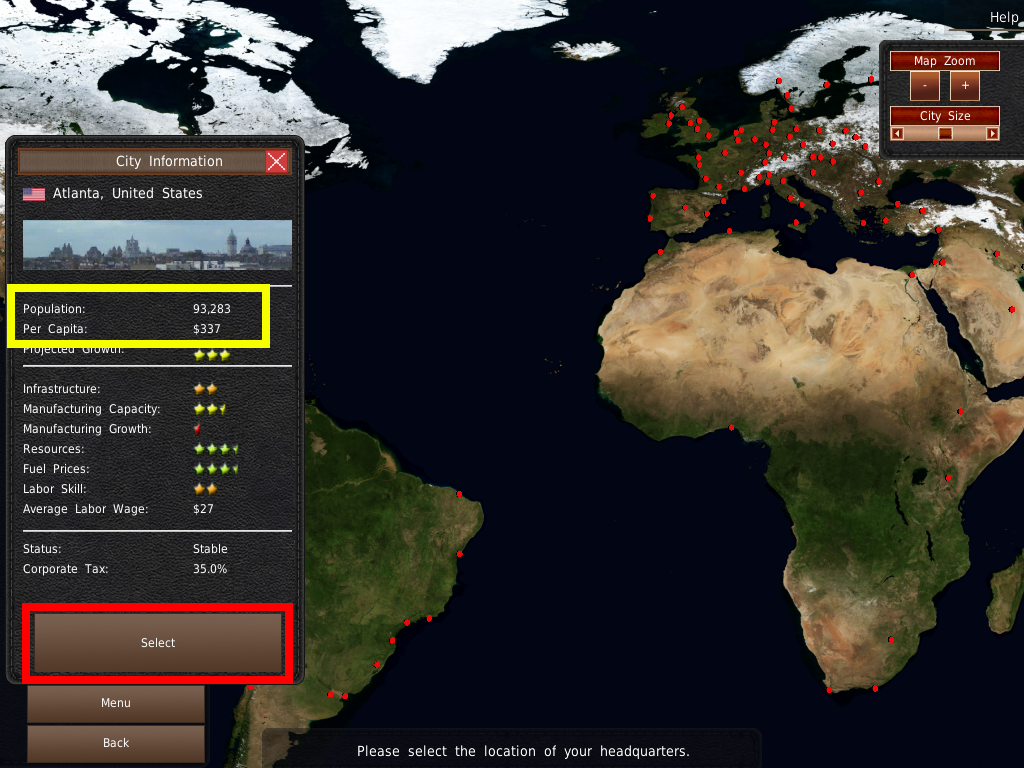
5. This is the “City Information” window.
For new players, the two critical details to look at are the “Population” and “Per Capita” figures.
Concerning “Population,” only a limited number of households are purchasing new vehicles at any given time. The fewer people in a city or territory, the fewer vehicles sold there, if any at all. As such, you should focus on selling vehicles in larger cities where more people are buying vehicles. This is especially important before 1920.
“Per Capita” is the average amount of income a single family makes in a year. A typical household will spend their yearly income purchasing a vehicle every 3 to 8 years. Therefore, the higher a “Per Capita” value is, the more potential sales. Remember, “Per Capita” is an average. Half of the buyers make less than the “Per Capita” rate, while less than 25% of the buyers make twice the “Per Capita” rate. This distribution of wealth is why choosing a larger city to start in is important, especially before the year 1920.
We recommend for new players to start in a North American or Western European city with a “Population” greater than 1 million and a high “Per Capita” income.
When you have found a city, click the Red Glowing “Select” button on the “City Information” window.
Part 3: Designing Components
You can find this part of the video tutorial on the video tutorial page. While in-game, please use the in-game video tutorials page.
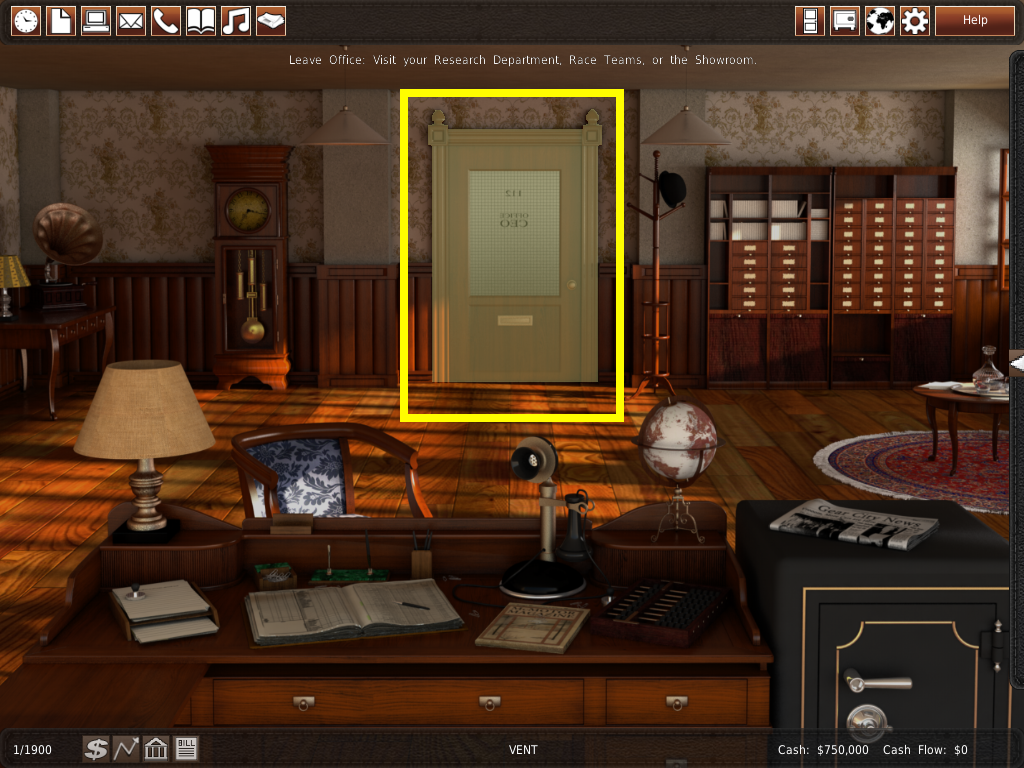
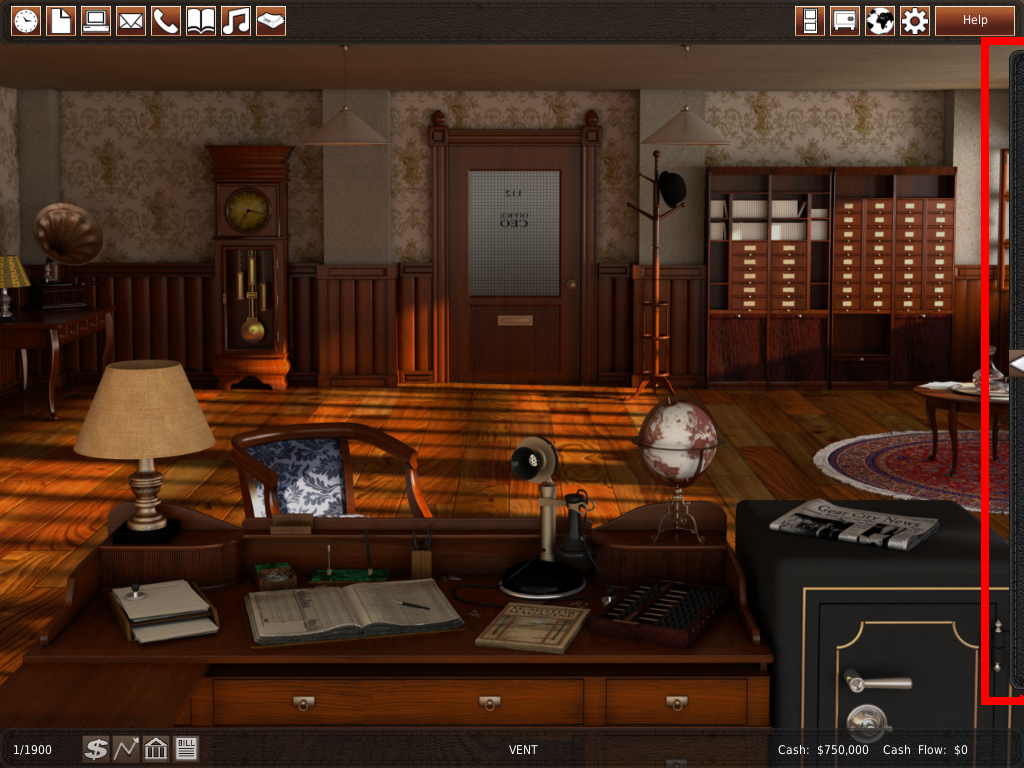
6. The “Office” is the main hub of the game. You will find most of the data you need to run your company here. This room also acts as a gateway to other rooms in the game. Other rooms contain more in-depth data than presented in the Office, as well as additional tools and features. To access these rooms and your data, click on any objects that glows when your mouse hovers over them.
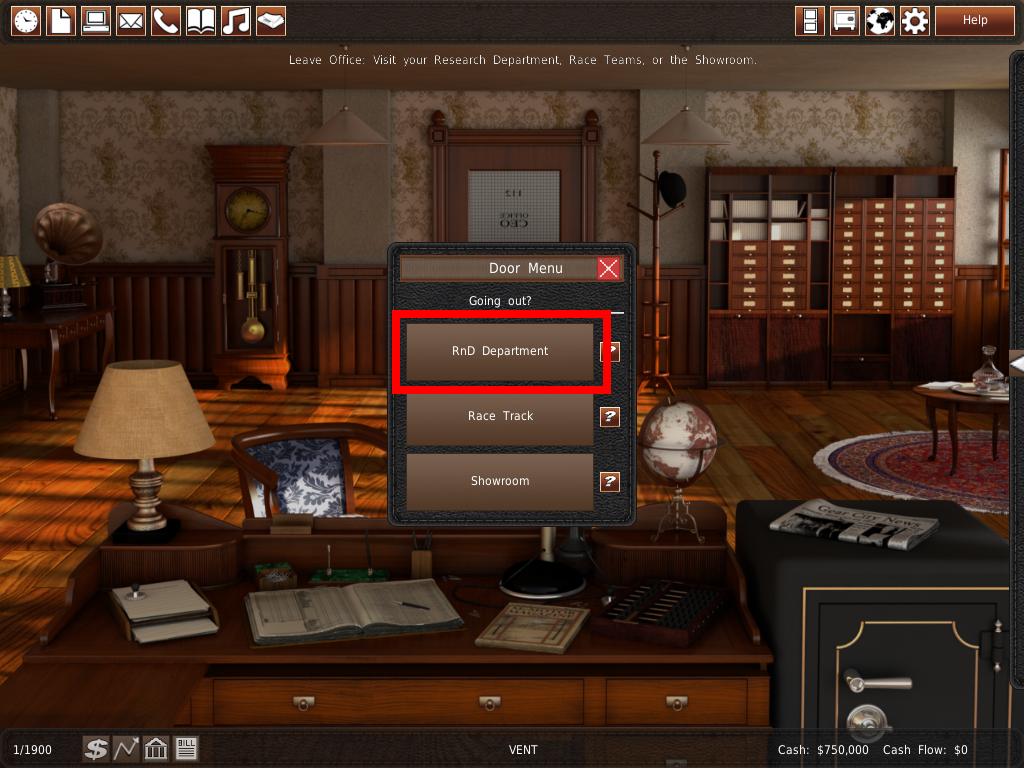
Since you are running an automobile manufacturer, you should design a vehicle. To design vehicles and components, we must go to the “RnD Department”. Click the Yellow glowing door to bring up the door menu. Then click Red glowing “RnD Department” button to continue.
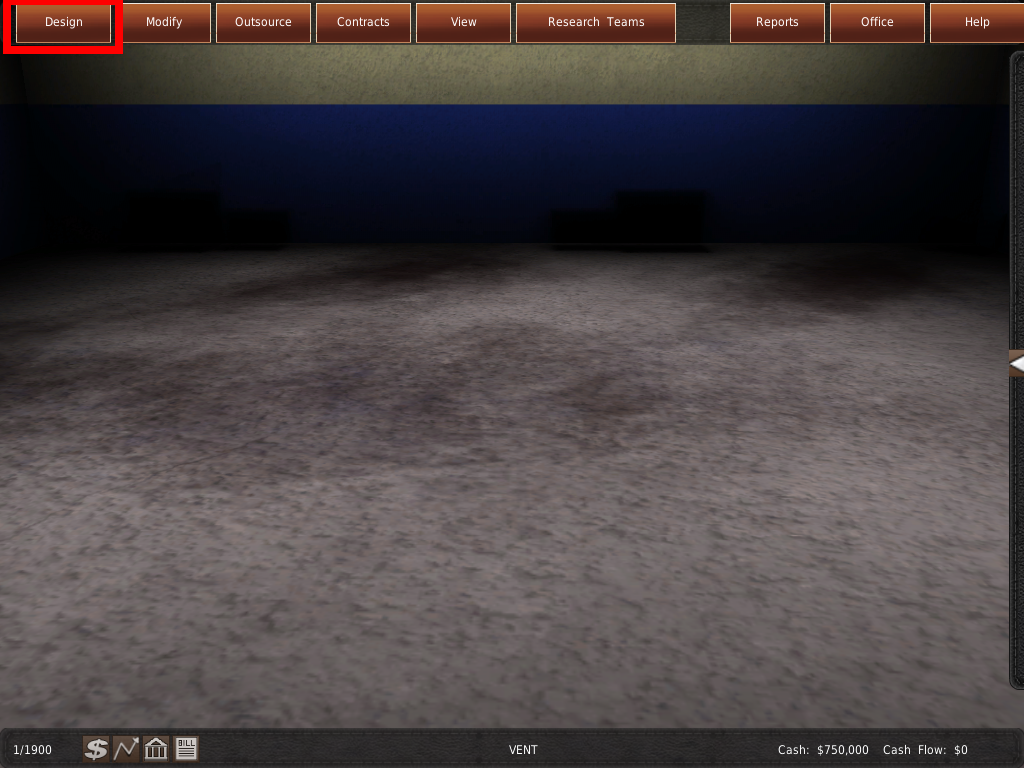
7. Welcome to the Research And Development Department. You design components and vehicles in this room. It also contains the component modification, discontinuing, and outsourcing systems.
Every vehicle in GearCity requires three major components: chassis, engines, and gearboxes. To design a vehicle, these components must work together. For example, the engine dimensions must be smaller than the maximum supported by the chassis. Otherwise, the components will not work together, and you will not be able to design a vehicle.
To design components, we must click on the red-glowing “Design” button in the upper menu.
Please click continue, then click the red-glowing button.

8. The first component we need to create is the chassis. Speaking in layman terms, the chassis is the main component that holds a vehicle together. It connects all other major components of the vehicle onto one platform. The chassis has an important role in the handling and physical characteristics of the vehicle. In the game, a chassis has 4 selectable components. Chassis designs need to focus on their application. For example, a truck chassis should focus more on strength and durability.
Please click the red glowing “Chassis” button under the “Design” button.
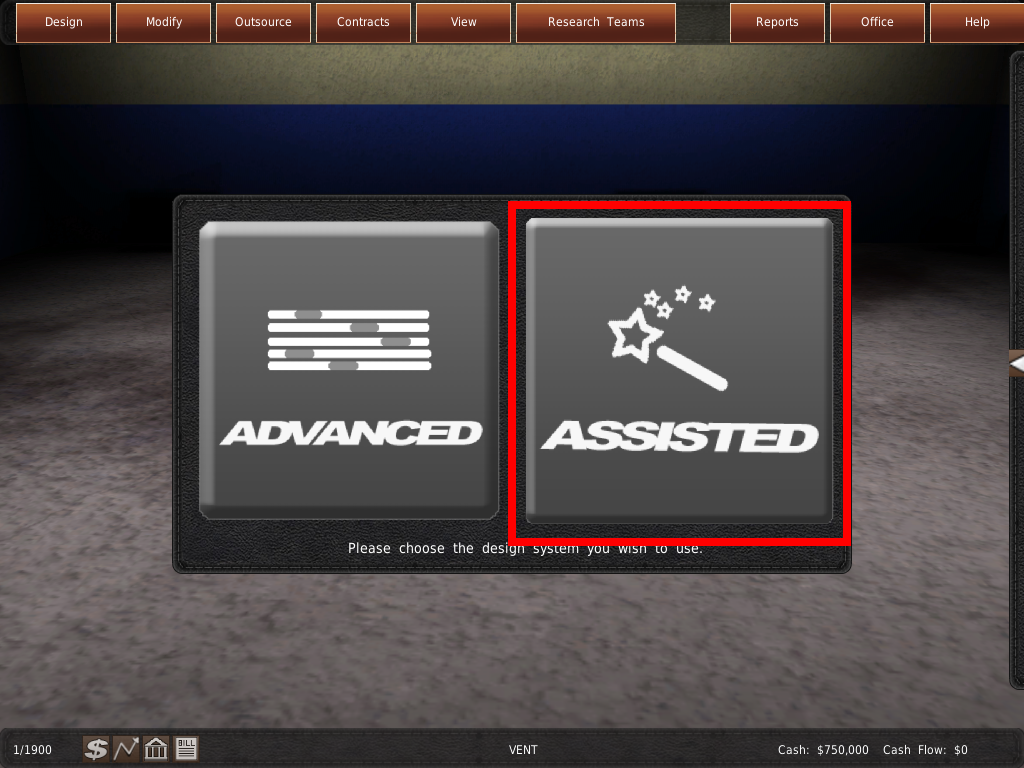
9. GearCity implements two ways to design components and vehicles, the more detailed “Advanced” designer, and the lesser detailed “Assisted” designer.
The “Advance” designer allows you to fine-tune small details through a series of sliders. Each slider affects the design characteristics of the component or vehicle in multiple ways.
The “Assisted” designer uses the AI to help you design a component or vehicle with minimal details required. This is the best option for new players and speeding up or skipping the design portion of the game.
We will use the “Assisted” designer for this tutorial. Please click “Continue” and then the Red glowing “Assisted” button.
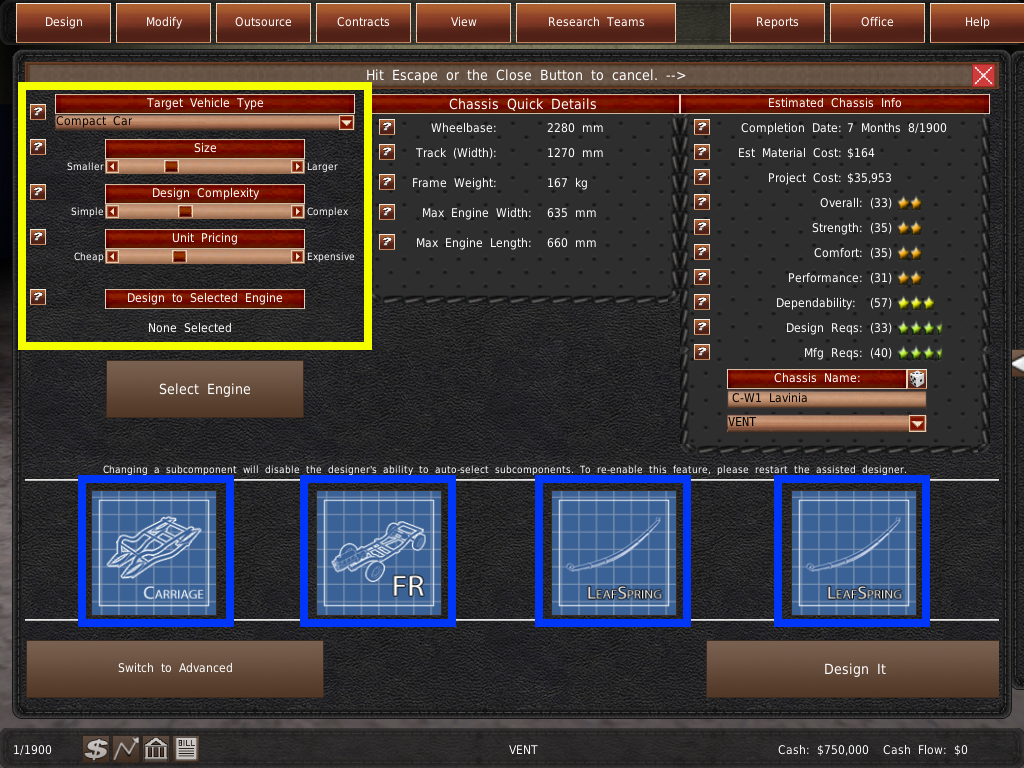
10. The “Assisted” designer does much of the work for you. You will still need to tell the designer the general focus of the project.
Everything under the Yellow glowing allows you to adjust the focus of the “Assisted” designer.
The buttons under the Blue glowing allow you to change subcomponents of the component.
Please click the “Continue” button in the “Tutorial” window to continue.
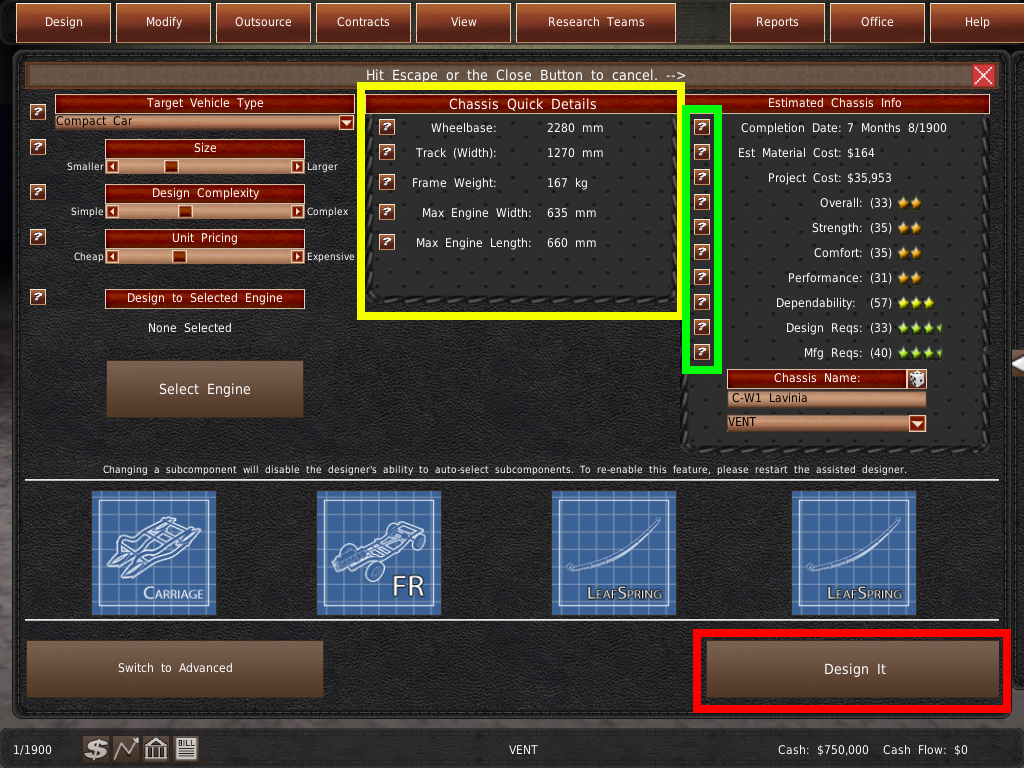
11. Glowing yellow is the specs panel. The maximum supported engine size is the physical dimensions of the largest engine we can use with this chassis.
Click the green glowing “Help” buttons for more information about a particular topic. These buttons are everywhere in the game.
The “Assisted” designer optimizes the chassis to the best of its ability for the selected vehicle type. You should change the design if it is not what you want. After you have made your adjustments, you have to approve its design. To do this, click the red glowing “Design It” button.
Please click “Continue” on the “Tutorial Window” then select “Sedan” from the “Target Vehicle Type” drop-down in the Chassis Designer. Once you have done this, design your chassis. Since this is your first vehicle, try to make the overall rating 2 stars. If you design a highly rated chassis, it will result in a chassis too expensive to sell. When you complete the design, click the red glowing “Design It” button.
12. Now you need to design an engine. The procedure is the same as the chassis “Assisted” designer.
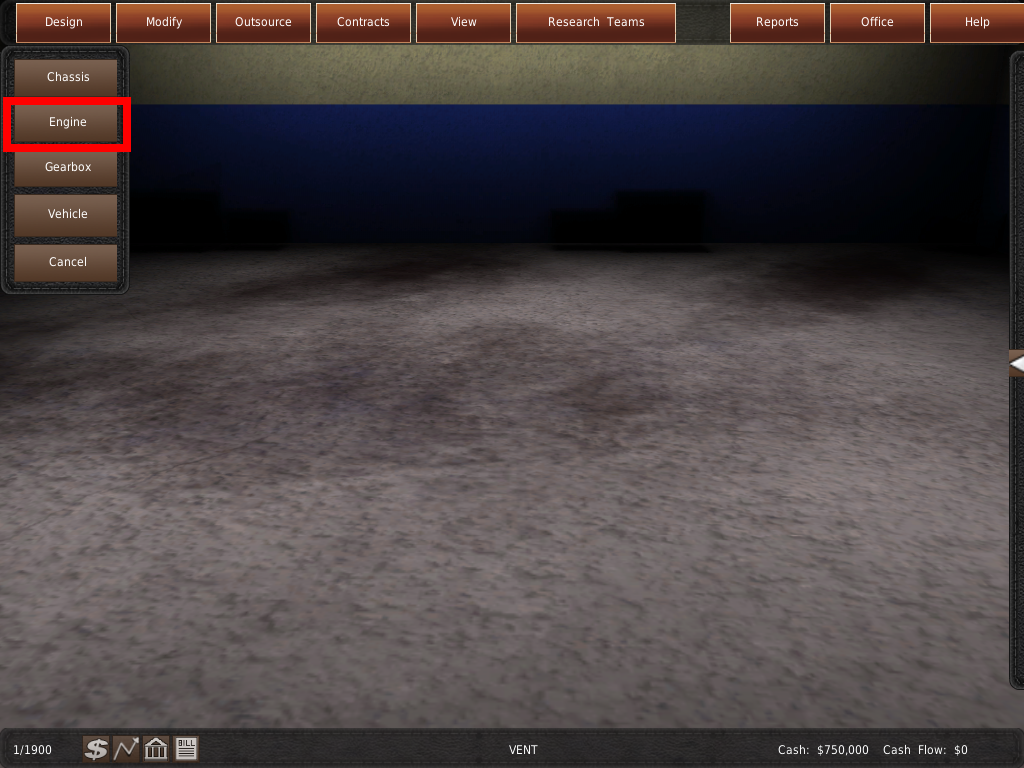
Click the red-glowing “Design” button on the top panel. Next, click the Red glowing “Select Engine” button. And finally, the red-glowing “Assisted” designer.
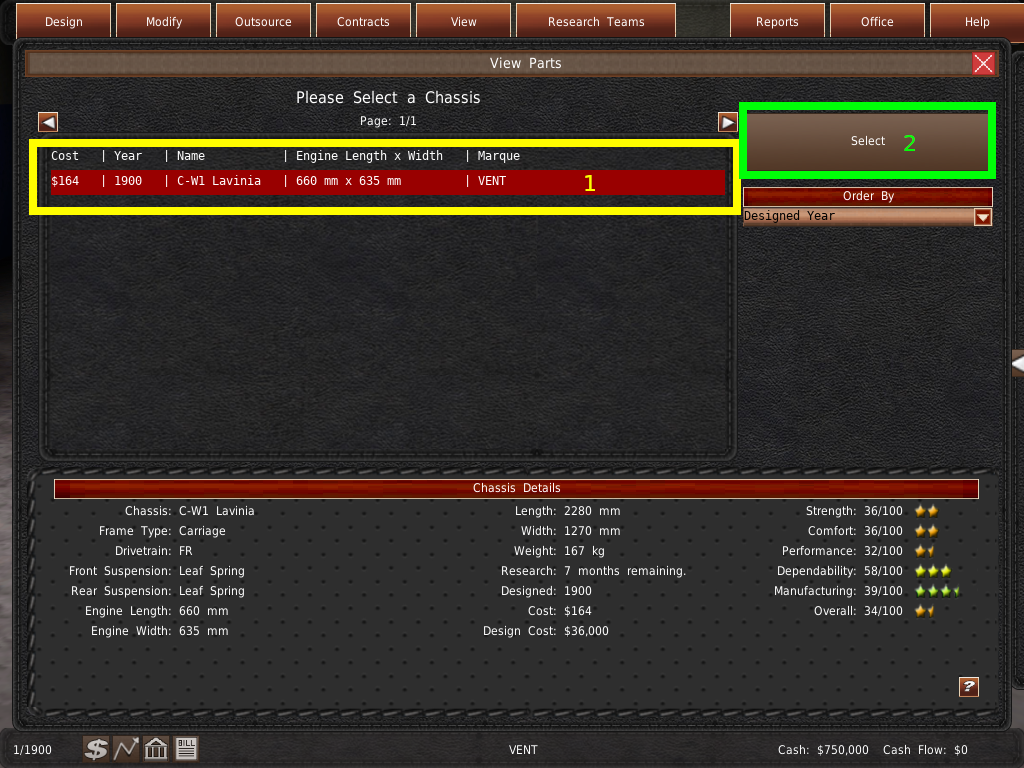
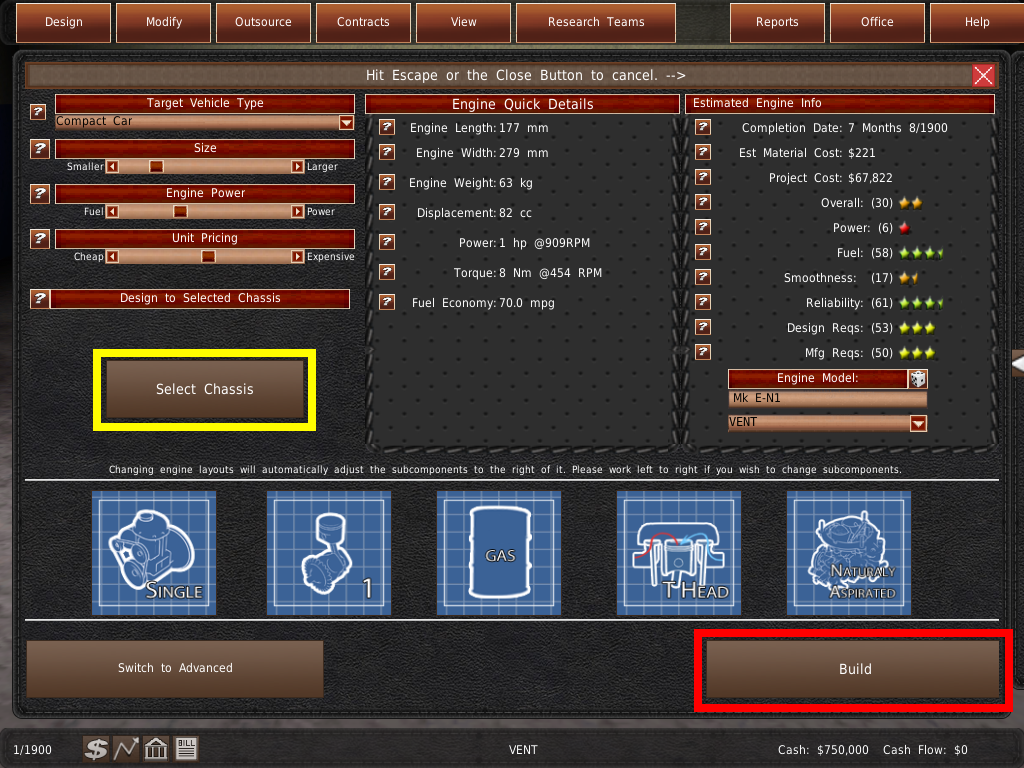 13. Make sure that the engine you are designing fits your target chassis. To check if it fits, click on the yellow-glowing “Chassis” button and select your chassis.
Select “Sedan” from the “Target Vehicle Type” drop-down in the Engine Designer. Once you have done this, design your engine. Like the chassis, try to make the overall rating 2 stars. When you have completed the design, click the red-glowing “Design It” button.
14. The last component you need to design is the gearbox. To do this, follow the same steps you used to make the Chassis and Engine.

Please select the red glowing “Design” button. Then click “Gearbox.” Finally, you choose the “Assisted” designer.
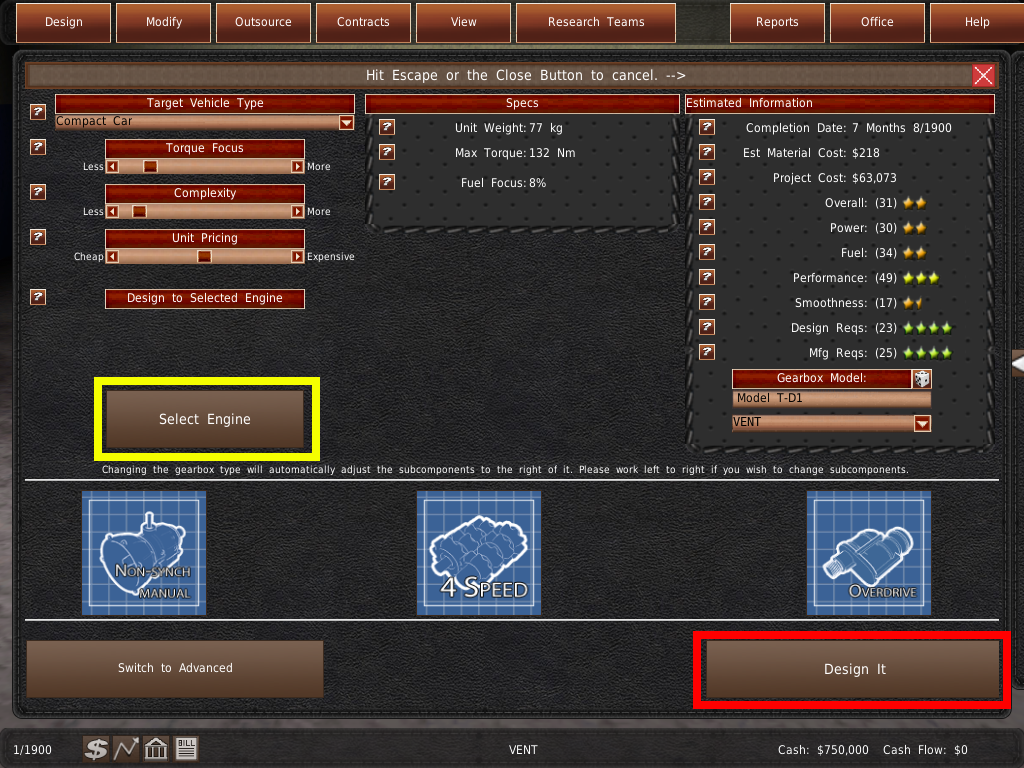
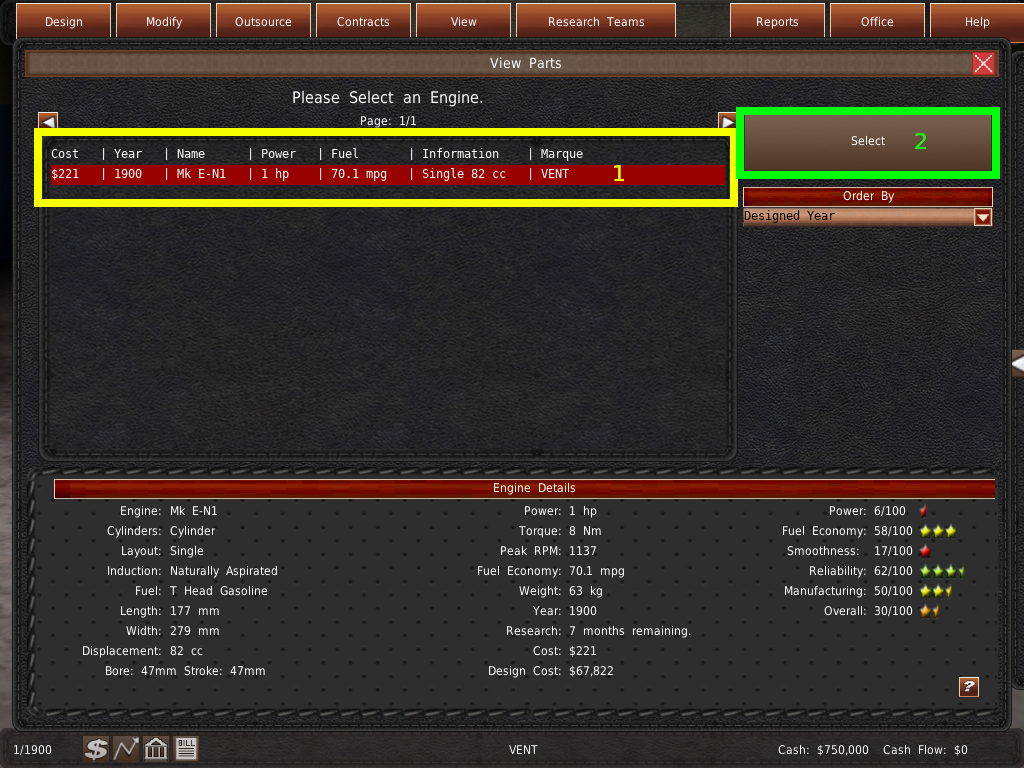
15. Make sure that the gearbox you are designing can handle your target engine torque. To check if it works, click on the Yellow glowing “Select Engine” button and select your target engine.
Select “Sedan” from the “Target Vehicle Type” drop-down in the Gearbox Designer. Once you have done this, design your gearbox. Like the Engine, try to make the overall rating 2 stars. When you have completed the design, click the Red glowing “Design It” button.

16. Now that you have created the three components, you need to return to the office and end the turn. It will take a few months for the engineering teams to finish the designs. I will tell you more when we return to the office.
To return to the office, click the red glowing “Office” button in the upper right-hand corner.
17. Designing new components takes a long time in real life. The same is true in the game. A number of months must pass before the components are completed. How long does development take? The “Side Panel” lists the design times and other data in every room.
On the right-hand side of the screen, glowing in red is the “Side Panel.” Move your mouse over the “Side Panel” to continue the tutorial.
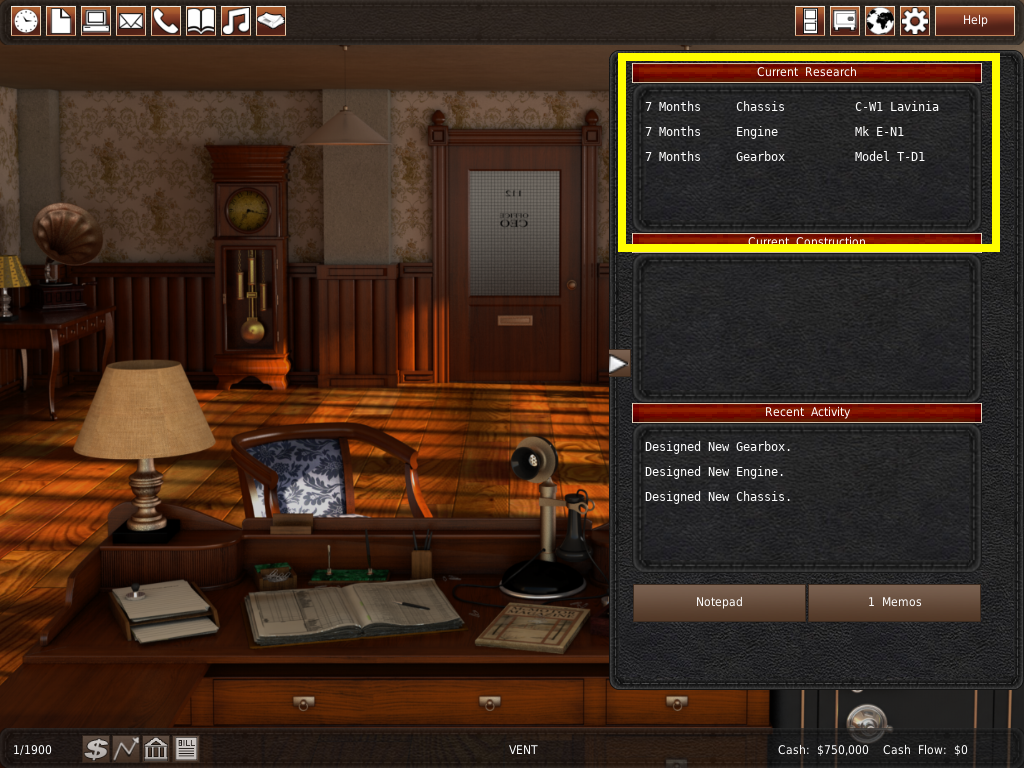
18. The “Side Panel” contains a list of your projects under research. It also contains another list of all your factories under construction and a list of your recent actions.
The list at the top should show three projects, a chassis, an engine, and a gearbox. Vehicle development cannot start until these three components are finished. You need to skip the number of months of the component in development the longest.

To end the turn, click the Yellow glowing clock in the Office.

19. This is the “End Turn” window.
This window allows you to skip more than one turn at a time. Enter the number of months in the text box to skip those turns. This should allow enough time for the engineers to finish the component designs.
Click the Red glowing “Yes” button to continue.
20. Check if the engineers have finished the designs in the “Side Panel”.
If any components are in the researching list, you need to skip more turns. Click the clock and enter the number of turns remaining.
Completed designs will not show up on the researching list. If you have completed all three designs, you will begin designing the vehicle.
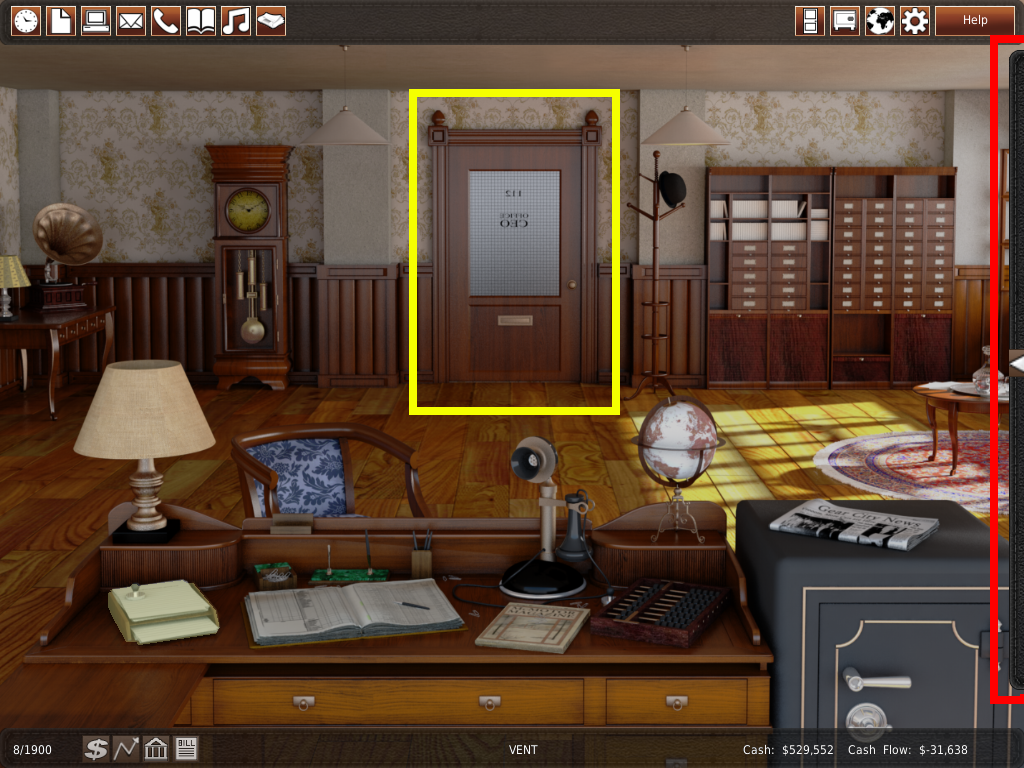
Click the door and return to the RnD Department.
Part 4: Designing a Vehicle
You can find this part of the video tutorial on the video tutorial page. While in-game, please use the in-game video tutorials page.
21. It is now time for you to develop your first vehicle! Designing vehicles similar to the design of components, however, you must also design the vehicle body. You start the same way as you designed the components. Click the Red glowing “Design” buttons in the upper left.
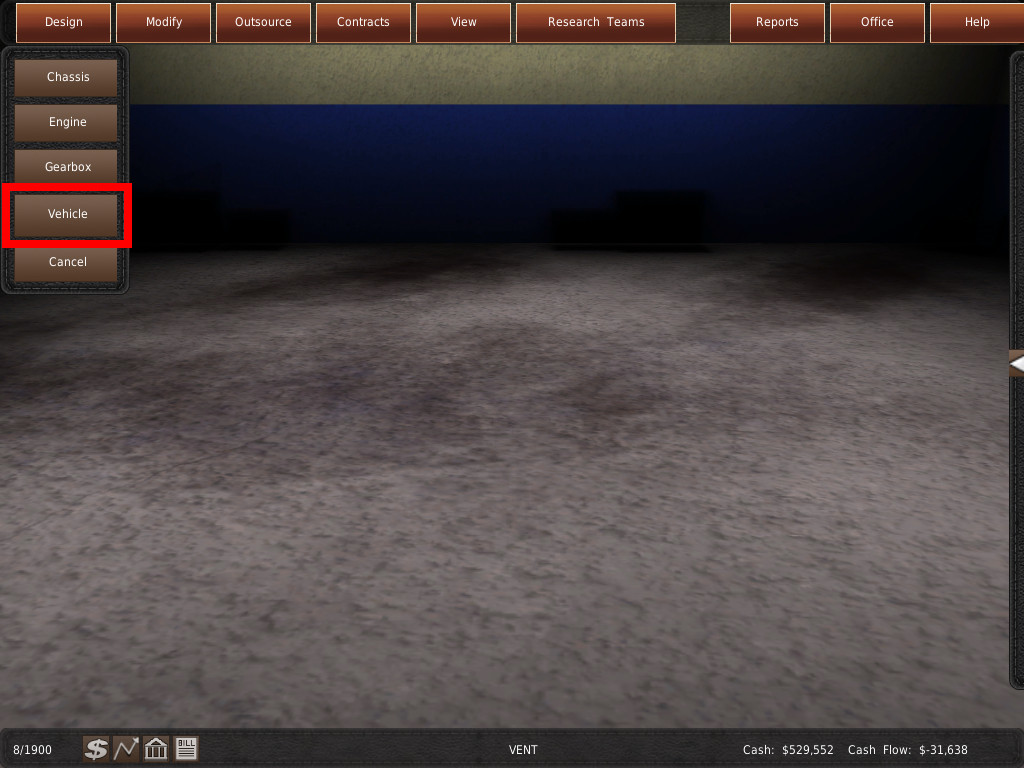 Then choose the Red glowing “Vehicles” button.
Finally, select the “Assisted Designer”.
22. The “Assisted Vehicle Designer” works like the other “Assisted Designers”, but it requires extra steps to complete the design.
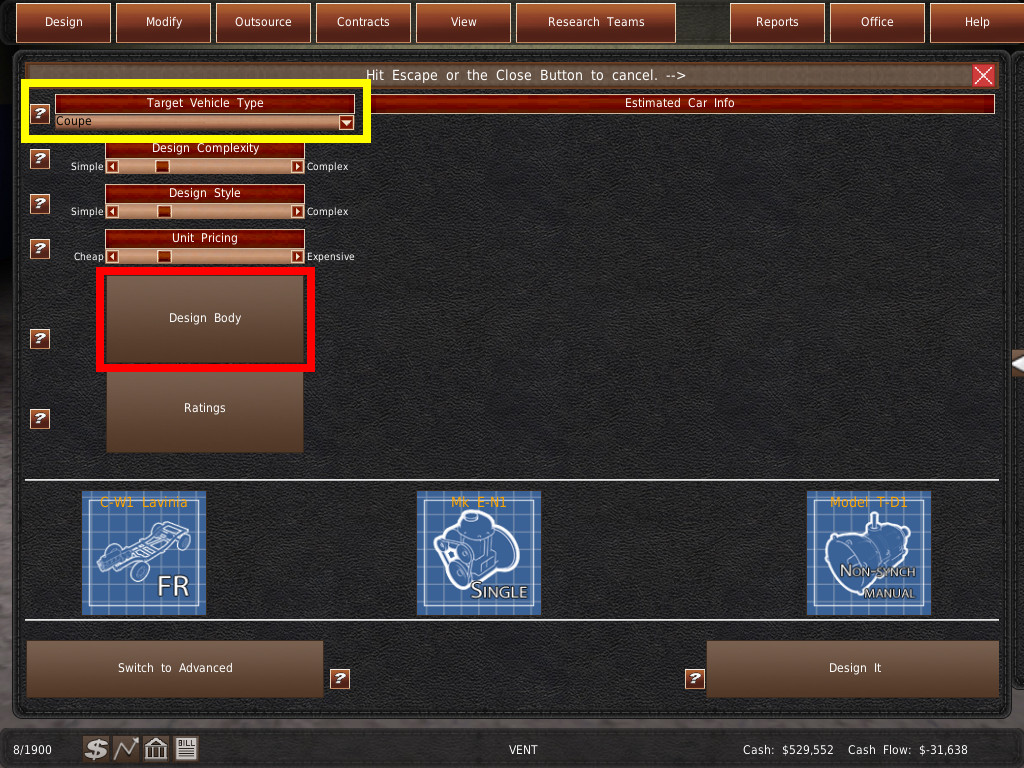
First, you will want to select your vehicle type. To do this, click on the Yellow glowing drop-down box. You should select a popular vehicle type such as “Sedan”.
Next, you need to design the body. Click the red glowing “Design Body” button on the left of the window.
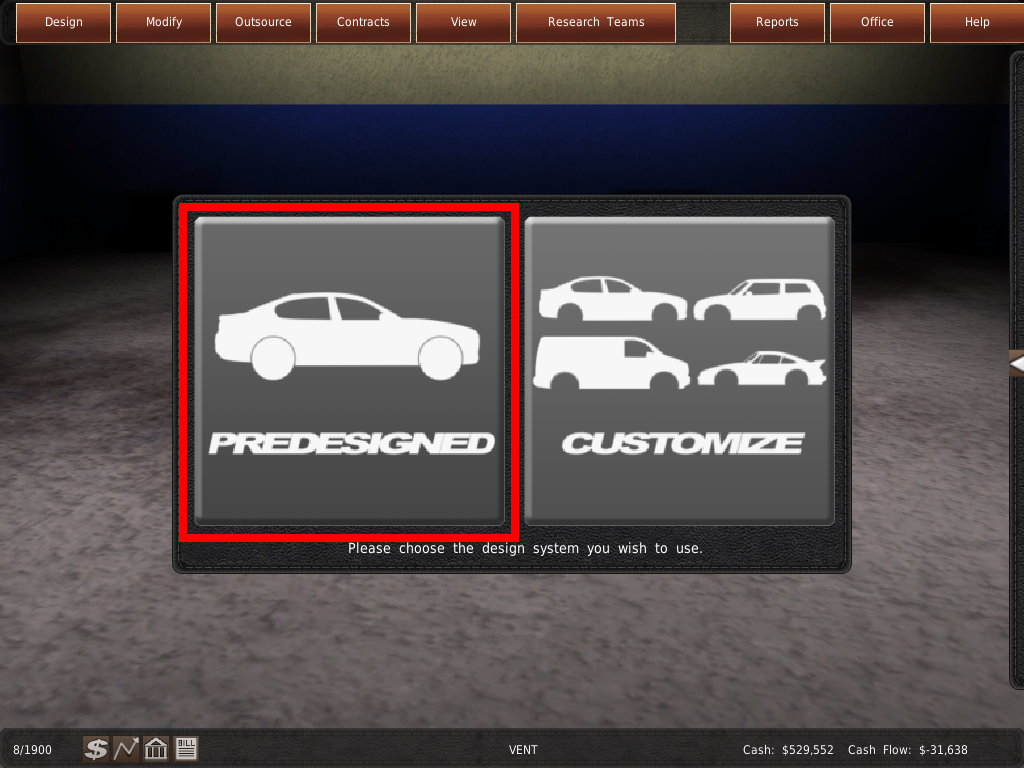
23. There are two ways to create a car body. To save time, use the “Predesigned” vehicles.
Click the glowing red “Predesigned” button.
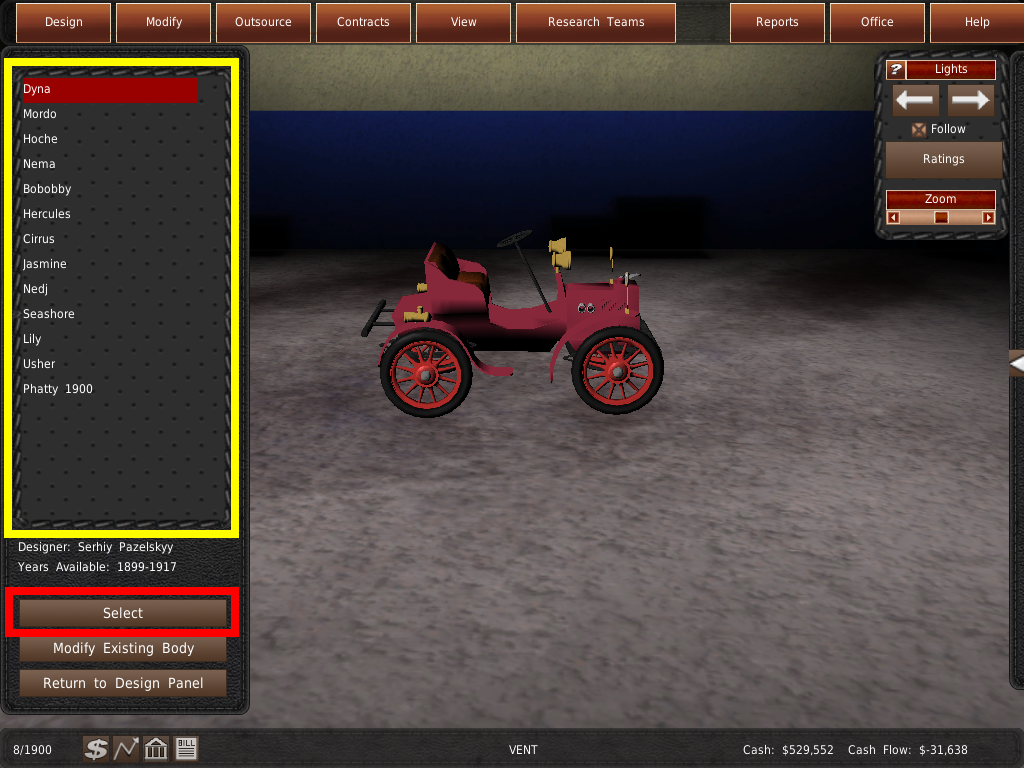
24. On the left side is a list of predesigned vehicles. Choose which vehicle you want from the list, then click the glowing red "Select" button.

25. With the body designed, the “Assisted Designer” will now generate vehicle ratings and specs. Adjusting the sliders in the Assisted Designer will also alter the ratings now.
Go ahead and adjust the sliders of your first design. A tip for new players, try to keep unit costs low until you get a feel for the game. An average vehicle is about 2-stars or 30 out of 100 points.
If you have completed your design, click the Red glowing “Design It” button to finish the design.
26. The vehicle is now ready for development. You will need to skip some months for it to complete.
Return to the Office by clicking the Red glowing “Office” button.
27. You must skip some turns until they finish the vehicle development.
Go ahead and click the clock and enter the number of turns you need to skip. If you forget the amount, check the side panel.
28. Check Side Panel. Is the vehicle still being researched?
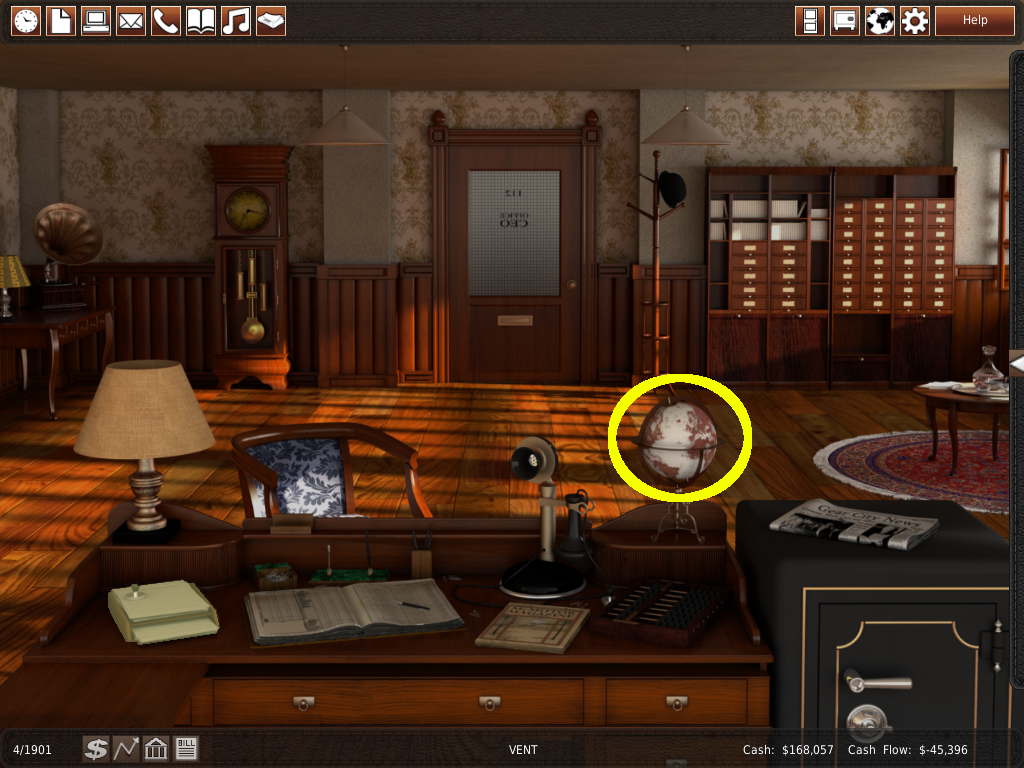
If development has finished, click the Yellow glowing Globe on the desk to go to the World Map.
If the vehicle needs more time, skip the number of turns required.
Part 5: Production and Sales
You can find this part of the video tutorial on the video tutorial page. While in-game, please use the in-game video tutorials page.
29. Welcome to the “World Map.”
The “World Map” allows you to manage, maintain, create, and destroy factories and branches. It is also where you find the marketing system and where you manage the manufacturing and distribution of vehicles. The “World Map” also contains visual data maps for cities and your competition.
This “Room” plays a vital role in running your company. You can do most features implemented in the “World Map” in the “Office” “Mega Menu” (Computer). But the “World Map” gives a better visual representation and is easier to use. As a new player, you should use the “World Map” until you get a feel for the game.
The first thing you need to do is set up the manufacturing of your vehicle. Click the headquarters. It should be a different color than other cities on the map.

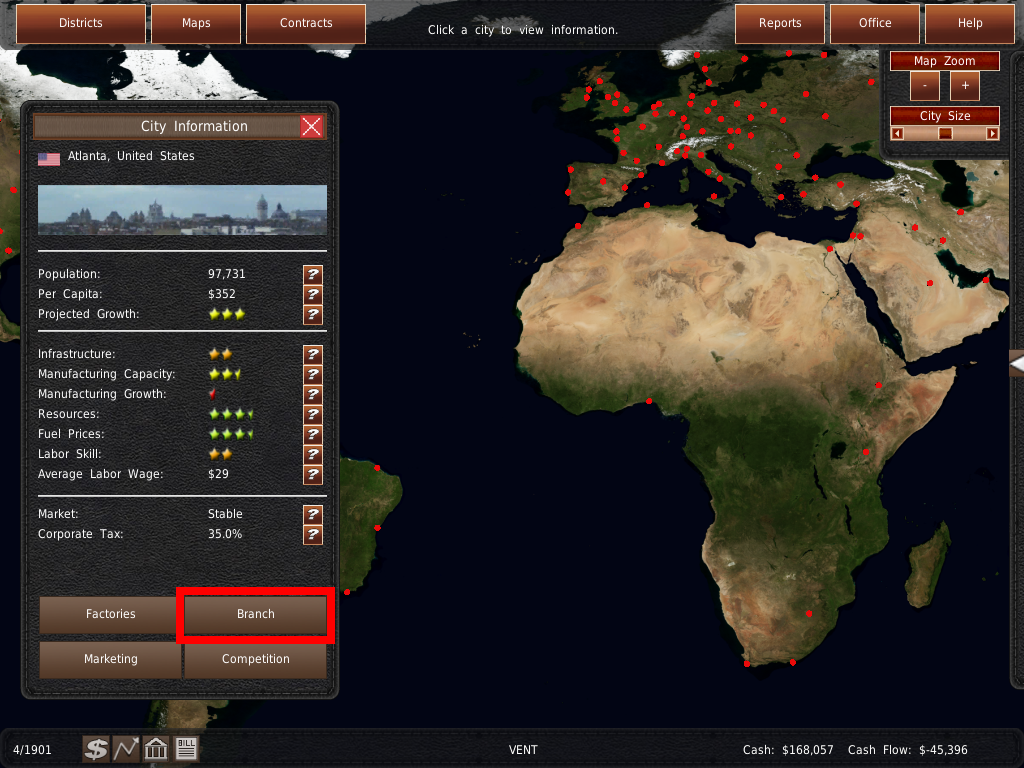
30. This is the “City Information” window you learned about at the start of the game. This time, extra buttons for your facilities in the city are at the bottom.
Click the red-glowing “Factory” button to take us to this city's factory options.

31. This is the “Factory Overview” window.
You control anything factory-related from here. This window allows you to build, redesign, close, and manage your factory in the selected city.
Since you have recently designed a vehicle, you will want to assign it to a production line. You must assign vehicles to a production line to produce vehicles. The more production lines you assign, the more vehicles you produce.
To do you need to open the “Production Manager” for this city. Click the red-glowing “Production” button.
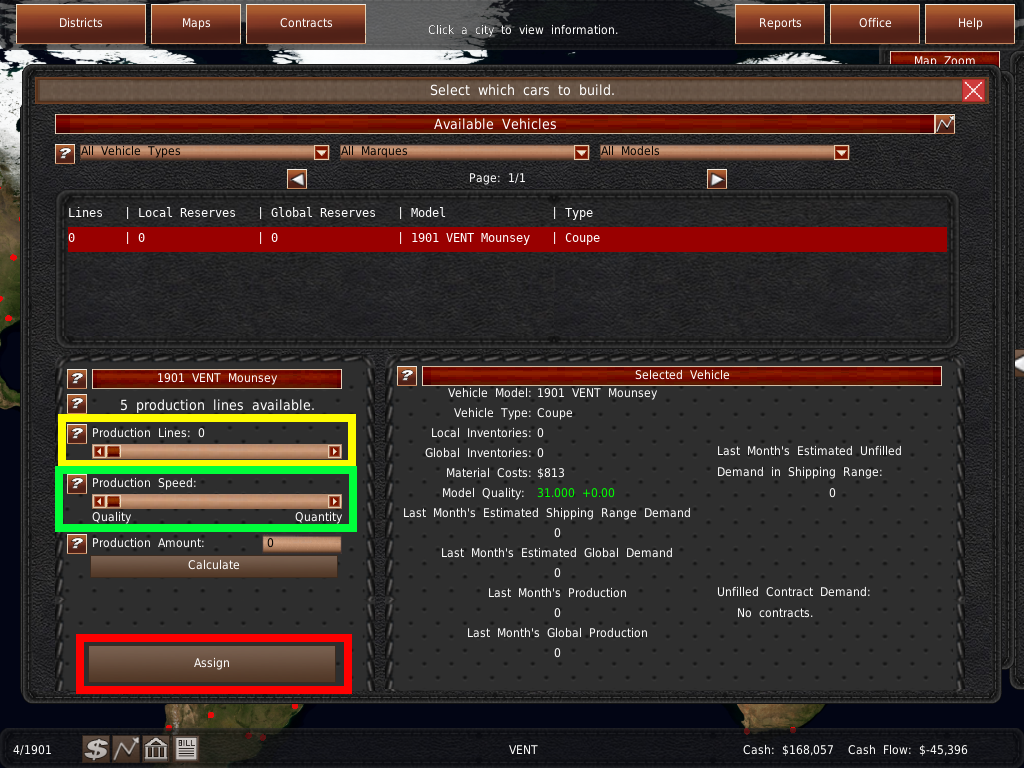 32. This window handles the production of vehicles. It allows you to assign production lines and adjust the production speed of the vehicles. You also get a summary of vehicle production and some extra data on the side panel.
The Yellow glowing “Production Line” slider allows you to assign production lines to the selected vehicle. Factories have a limited number of production lines, so assign them wisely.
The Green glowing “Production Speed” slider allows you to adjust the production team's focus on quality or quantity. Better quality vehicles are more desirable and improve your image. Focusing on higher quantities means you will produce more units per factory line, thus lowering the total costs per unit.
Click your vehicle from the list, then assign it to one factory line. Be sure that the “Production Speed” slider is set to half. When you have done this, click the Red Glowing “Assign” button to save the changes.
 33. You have successfully assigned a sales price to your vehicle. Return to the Office by clicking the Red glowing “Office” button.
 34. This is the “Branch Overview” window.
Branches work as a distribution point between the factories and dealerships. Dealerships are franchised companies. They are where your customers buy their vehicles.
The branch window contains the ability to build and close branches. It is also where you set the distribution prices for your dealerships.
To sell vehicles, we must set the Sell Price. Click the Red glowing “Distribution” button to continue.
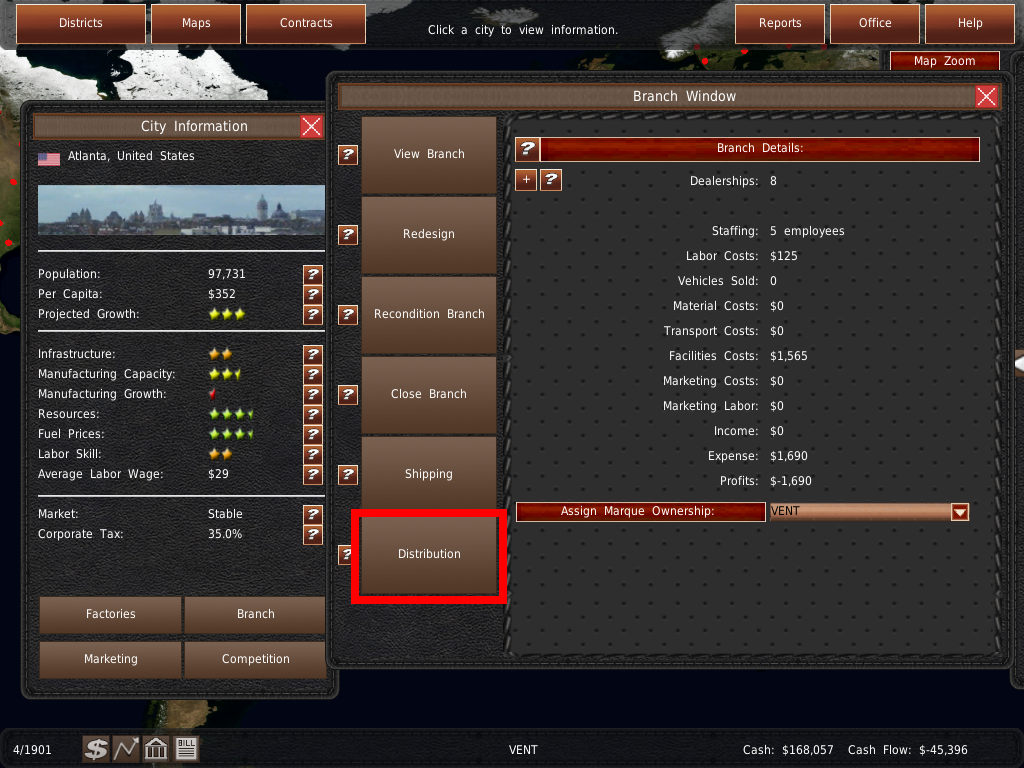
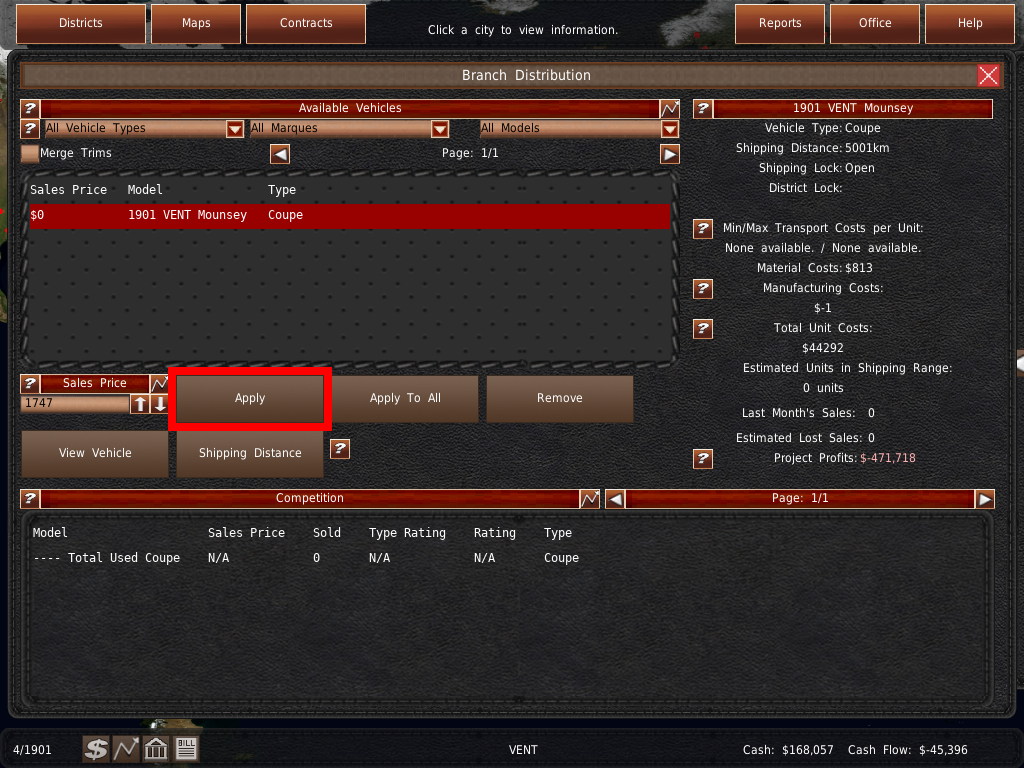 35. This is the “Distribution” window. It is here you set the sales prices for your vehicles.
The upper list is the vehicle models you have available to sell. This also includes how much you are selling the models for and the number of vehicles you sold the previous month. Selecting a vehicle will give you extra costs and inventory data on the right panel.
The bottom list is the competition for the selected vehicle model type in that city. This allows you to see what your competitors are pricing their vehicles at and the amount they are selling.
If it is not already, select your vehicle from the upper list.
If you need to adjust how far away you ship vehicles from, click the “Shipping Distance” button. You will ship vehicles from factories in cities within the shipping distance.
Finally, to sell a vehicle model, set the price in the text box under “Sales Price” and hit the Red glowing “Apply” button to save the changes. Please note, you should never charge more than 5 times the Per Capita Income for the selected city. The higher your selling price, the fewer people who can afford to buy it.
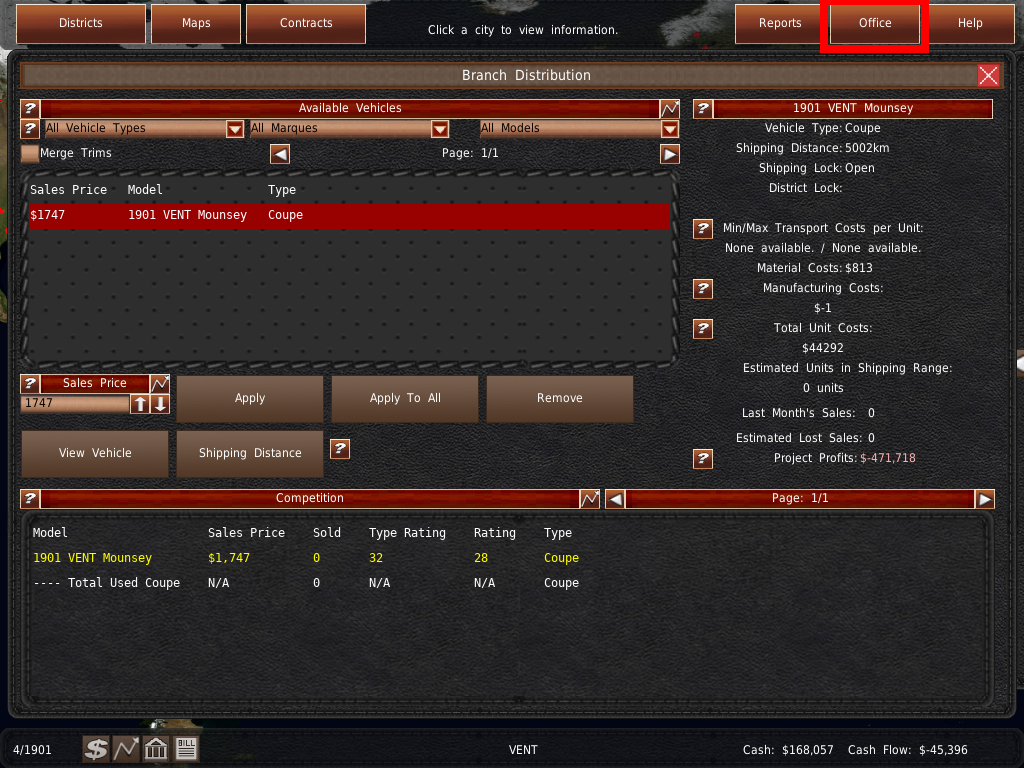 36. You have successfully assigned a sales price to your vehicle. Return to the Office by clicking the Red glowing “Office” button.
37. Welcome back to the Office.
You have designed the three major components. Designed a vehicle, assigned that vehicle to production, and set a sales price at a branch. Now all you have to do is end the turn. Once the turn processes, the “Monthly Report” will open. Scroll down to the bottom of the report to view your sales! Are you sold out of vehicles? Increase production (check the estimated demand in the “Production Manager” side data)! If you are producing too many vehicles, try lowering the price or building a second branch. Increase your sales by opening more branches. Do not be afraid to fail! Over 99% of auto manufacturers have failed. They either go bankrupted or merged into larger companies. With time and effort, you will learn how to manage a successful automobile manufacturer.
This concludes the Main Tutorial. You can find additional tutorials in the manual and on our video pages.
Good Luck, and enjoy GearCity!