
Table of Contents
Video Tutorials
Trims
Manufacturers often fit vehicles with multiple combinations of engines and gearboxes. We call this Trims. In GearCity, you can do this, and it’s encouraged.
With trims, you can offer more vehicle choices to consumers without paying full price for a new vehicle design. By offering more choices, you will increase your sales while taking sales away from your competition.
For Example. Let’s say there are two vehicles for sale with equal buyer ratings and equal prices. One is yours, and the other is your competition. There are 120 people in the city buying vehicles of this type. 60 buy your vehicle, and 60 buy your competitor’s. If you produce a trim with the same buyer rating and price, the number of customers would remain the same at 120 people, but the sales would split 40 apiece. That means you’ll get 80 sales, a 20 unit sales increase, and your competition would lose 20 sales. Your market share would jump from 50% to 67%.
Image Sharing
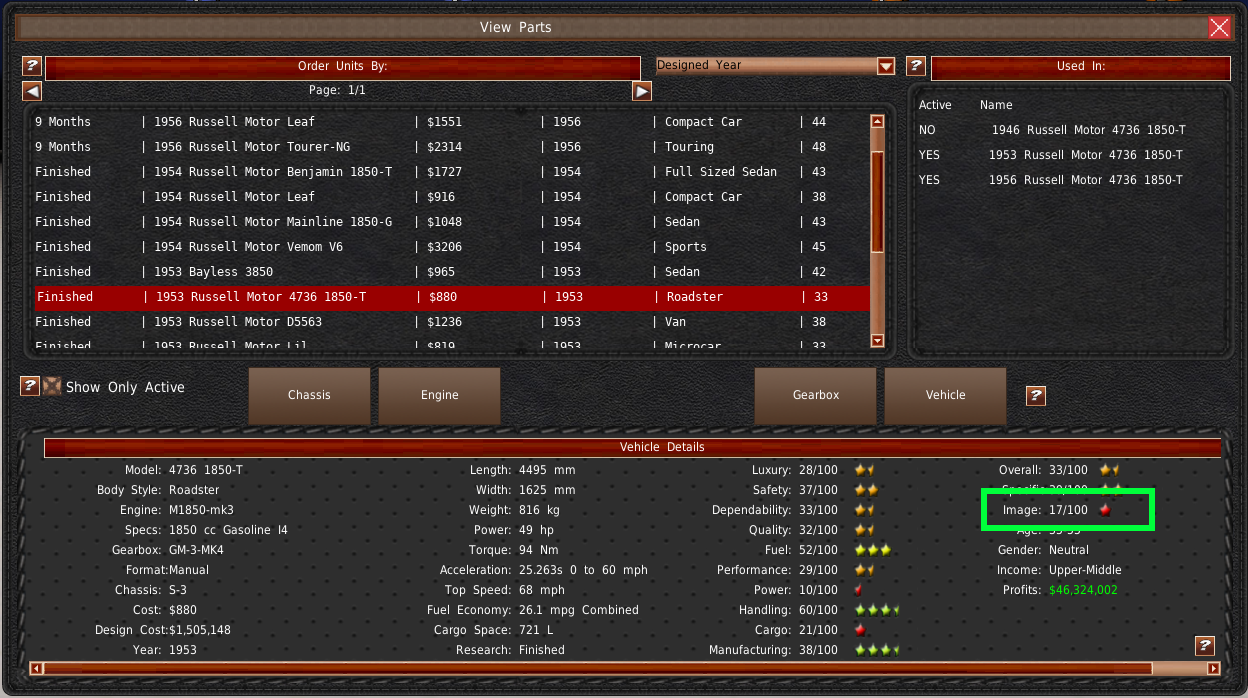
Another benefit of the trim system is image sharing. Every vehicle in the game has what is called "Vehicle Image." This image rating is a major factor in how consumers see your vehicle and the choices they make. With the trim system, the trims inherit the parent model's image rating, and any gains the trim makes in image rating will increase the parent's rating as well. With this in mind, you can use the trim system to increase the image rating of a base model parent by making the trim sufficiently better, thus selling more vehicles overall.
With this concept and using the New Generation system, you can grow your image ratings for the parent and trims over multiple decades.
Making a Trim
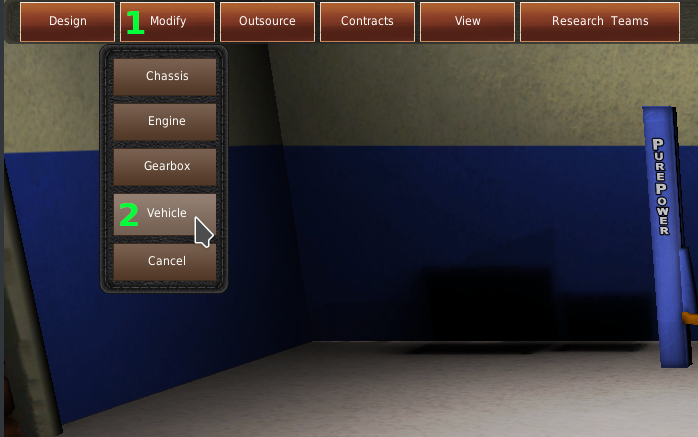
Making a trim is very similar to making a vehicle design. First, you'll need to go to the Research and Development room. Click the “Modify” button at the top of the window (#1). Then select “Vehicle” from the menu (#2). This will open the Vehicle Modification window.
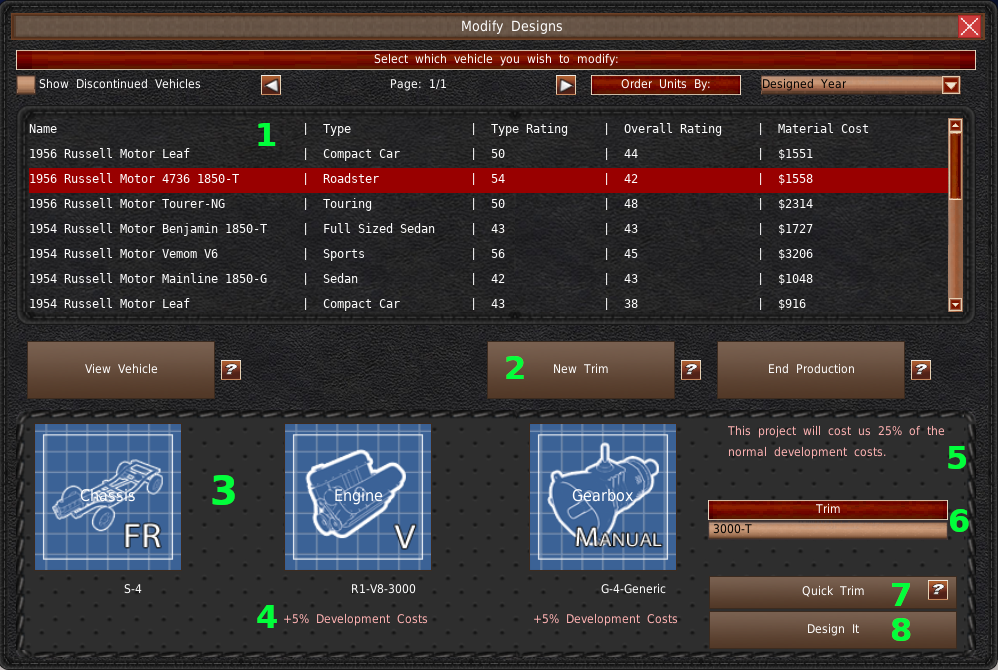
You'll need to select the vehicle from the list (#1) that you want to make a trim of. Then click the “New Trim” button (#2) to open the Trim Panel.
In this panel, you'll find three blue buttons (#3). These buttons are for component selection. Clicking any of these buttons will pull up the component selection window. If you decide to change a component, you'll have to pay additional development costs (#4). The development cost for a trim is 15% of a new design's development cost. If you change a component, you'll lose some of the discounts. For a gearbox change, it is only 5%. An engine change is 5%, but it also requires the gearbox development costs for a total of 10%. If you decide to change a chassis, the design will cost the same as designing a new vehicle. You can find the total percentage of development costs in the upper right (#5).
Be sure to name your trim in the text box (#6).
Finally, you have two options. If you plan on not making any changes to your sliders or body design, you can click “Quick Trim” (#7). The game will skip the designer phase and quickly make your new trim, thus completing the design.
But if you want to adjust sliders or make changes to the vehicle body, you'll need to click the “Design It” button (#8).
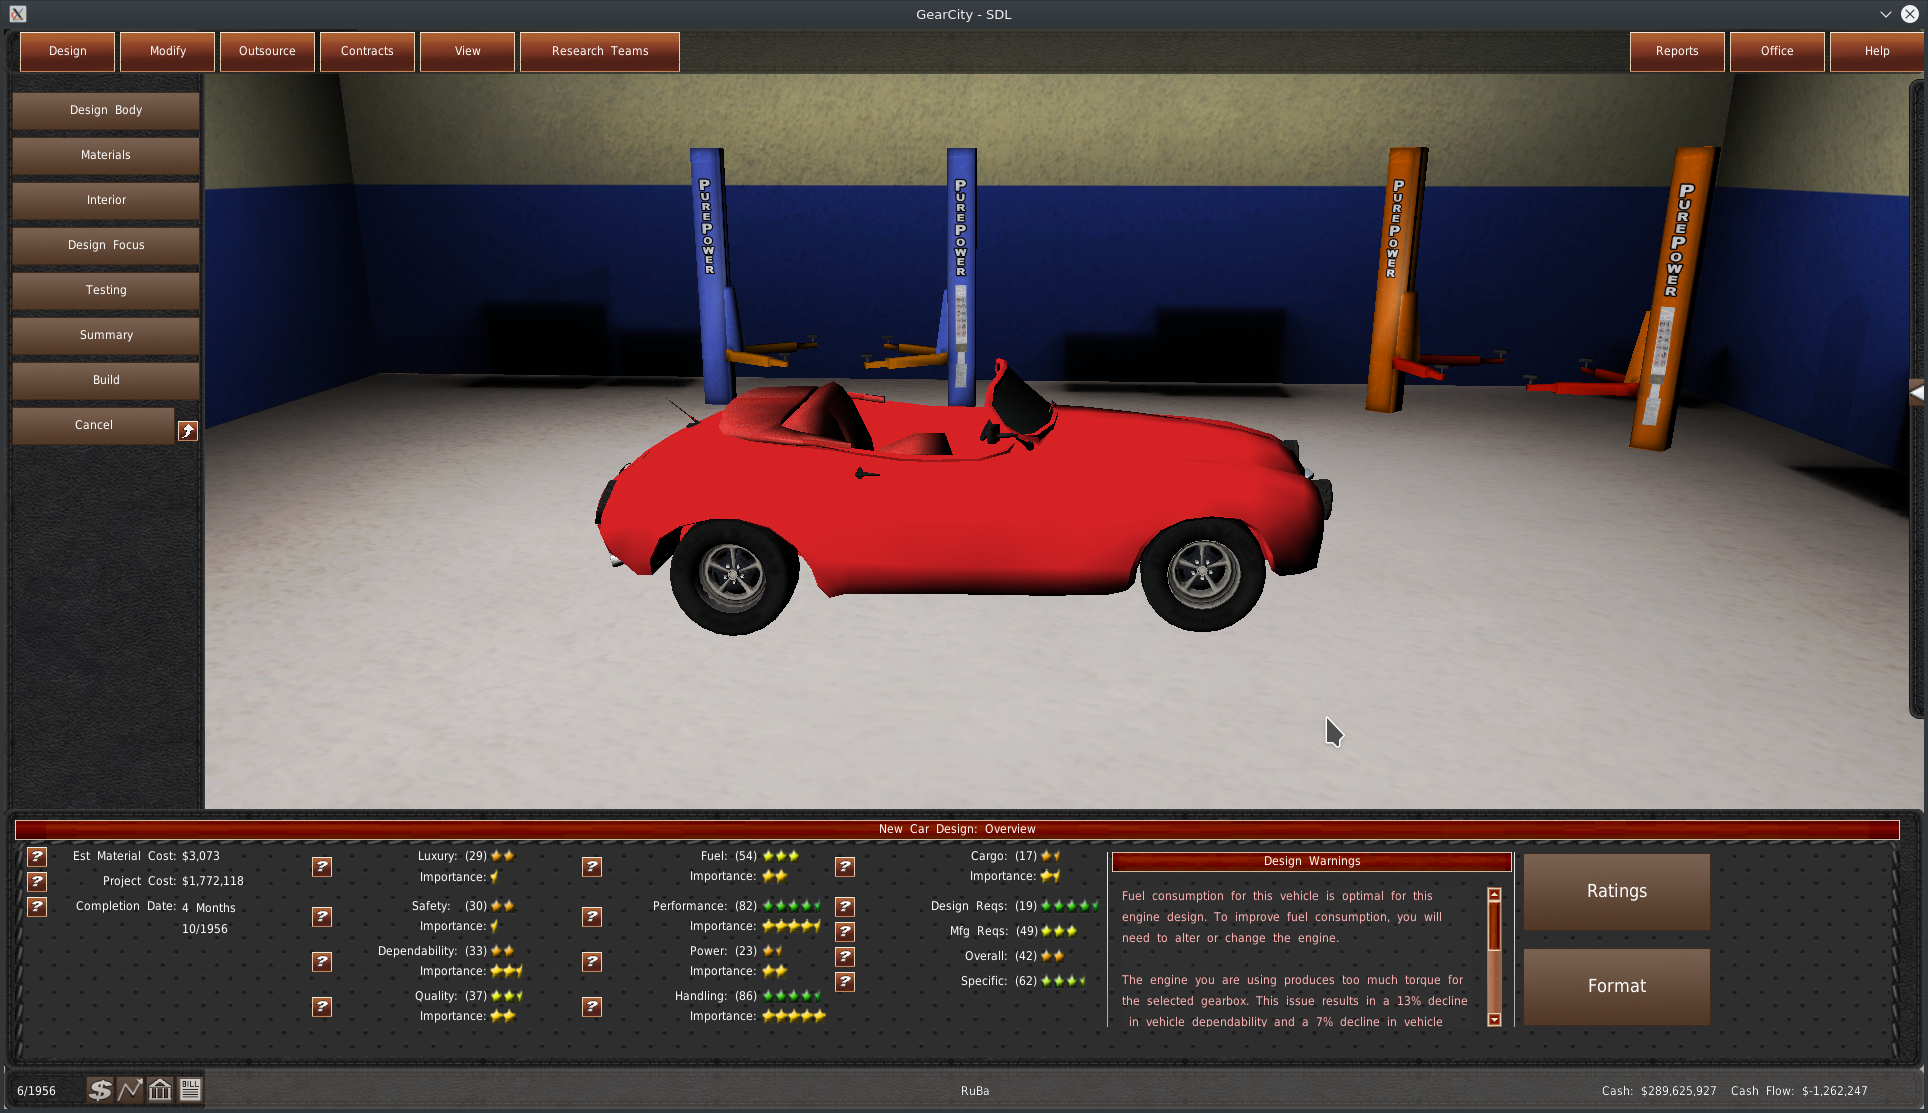
If you choose to continue with the advanced designer, it will work exactly like the advanced designer when designing new vehicles. Unfortunately, there is no way to switch to the Assisted designer.
When making design changes, please note, you will only get the trim discount while the sliders are within a reasonable limit of the base model. If you make the new trim significantly better, you will lose the new trim discounts. Please keep an eye on the design costs while you are adjusting sliders.
Philosophy
A smart way to use the trim system is to use the engine and gearbox replacement discounts to broaden the appeal of your base design. By using this system, you can increase the ratings of your design and have more vehicle options for customers without spending full price on new designs.
You always want to make a trim of a base model, and never a trim of a trim. When you make a new generation, make it of your base model and not a trim. Then you would make new trims off of the new generation base model. By doing this, you will maximize any gains you've made to the vehicle image rating. If your vehicle image rating is stagnant or has gone down, you may want to consider making a new design instead of creating a new generation.
Making a new trim can increase your overall sales. But at some point, there are diminishing returns. Remember, trims also take away sales from your other vehicles. It is possible to reach the point where you do not take enough sales away from competitors and take away too many sales from yourself that it becomes unprofitable to have a trim. Ideally, you should probably not have any more than 5 or 6 models, including trims, in any vehicle type market at the same time. This is especially true if your models overlap in both wealth demographics and focus.
Trim Tools
We offer a few tools to help use trims in parts of the game.
Branch Distribution
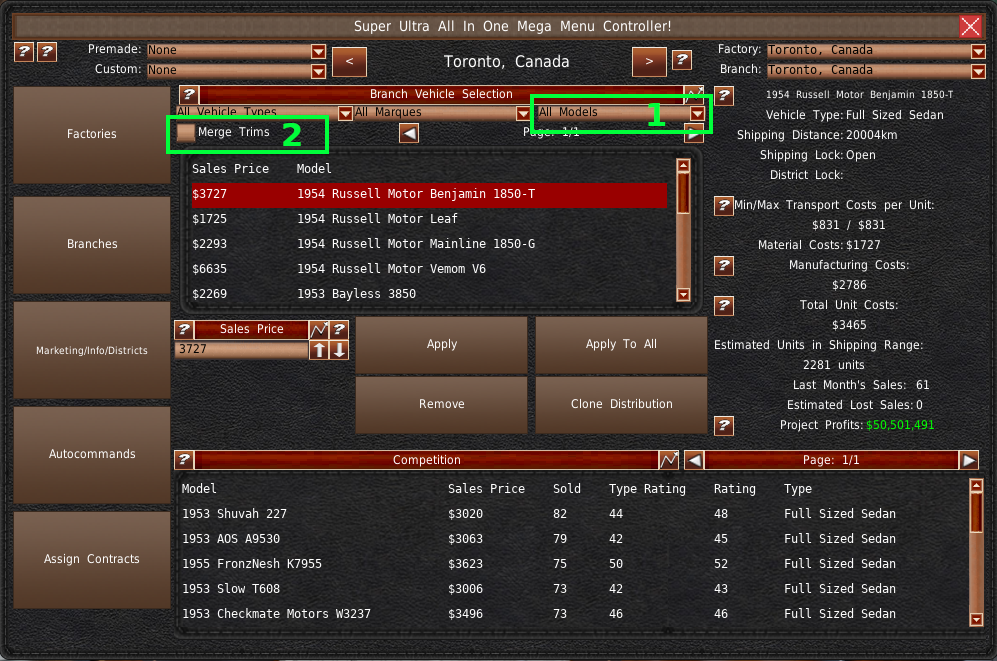
The World Map and Mega Menu branch distribution panels offer you a couple of filters based on trims. You can filter the lists by selecting the base model (#1) of your trims. Doing this will limit the list to just your base model and its trims.
Alternatively, you can check the “Merge Trims” checkbox (#2) to merge all of your trims into their base model. When you do this, changes you make to the base model will apply to all of its trims. For example, if you increase to 50% over unit costs, all of your trims based on this vehicle will have prices changed to 50% over their unit costs.
Refit

If you plan on making modifications to your component designs, the game gives you the option to make new trims of the vehicle using these designs with the “Refit” system. It is not recommended to use this system to make new trims, but the option is there. This system is primarily for making new generations, and you should make new trims based on those generations the regular way instead.
To use the refit system, you must check the “Refit Old Designs” checkbox before modifying the component. Click the “Modify” button (#2) when you're ready to modify the component. This action will open the Refit window.
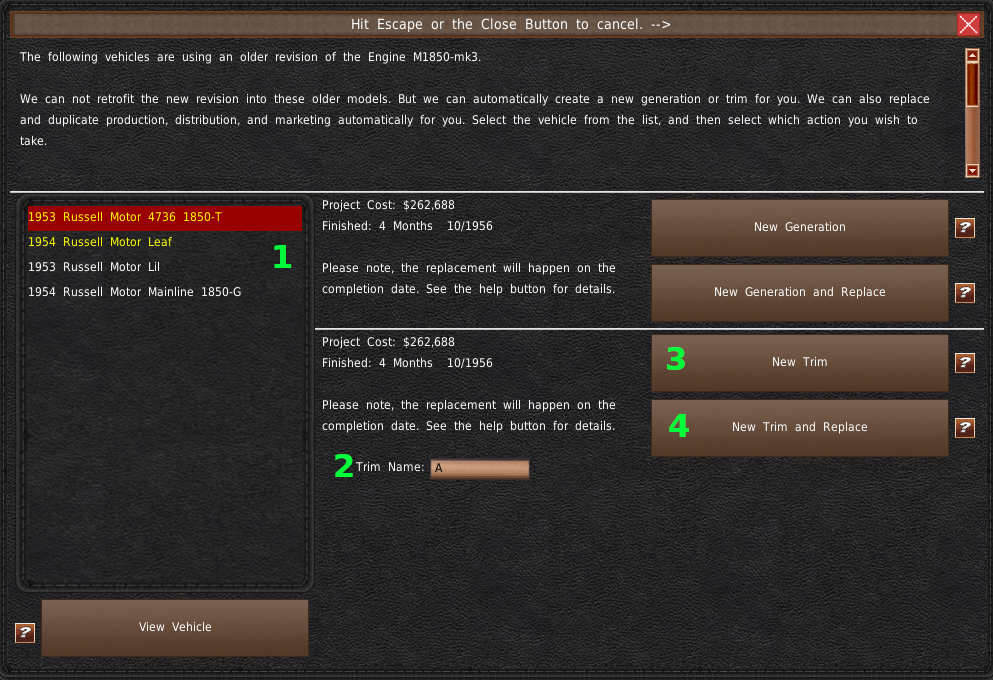
The refit window is broken into two parts. The vehicles that were using the design are in the left list (#1). Vehicles entries that are yellow have already had a new generation designed recently. Selecting a vehicle from the list will load its information. You can make a trim of this design using the modified part by naming the trim in the bottom text box (#2). Then you need to click one of the two buttons to the right (#3, #4). The “New Trim and Replace” button (#4) replaces the selected design with the new trim when you complete the new trim. This action will replace both branch and factory listings and will end the production of the old design.